ReadyLaunch is a WordPress theme designed for business websites, portfolios, and blogs. The theme includes pre-built templates, custom blocks, and extensive customization options.
This guide covers the installation and customization of the ReadyLaunch theme, as well as its core features and setup requirements.
What is ReadyLaunch Theme?
A WordPress theme controls your website’s appearance and functionality. It’s a collection of files that contain your website’s design and features. Every WordPress site requires an active theme to function correctly and display content to visitors.
Themes provide:
- Visual Design: Colors, fonts, and layouts;
- Page Structure: Headers, footers, and content areas;
- Responsive Display: Mobile and desktop compatibility;
- Extra Features: Beyond basic WordPress functions.
In other words, a WordPress theme allows you to:
- Display your content;
- Style your pages;
- Create navigation menus;
- Show widgets and/or sidebars.
Introducing ReadyLaunch
ReadyLaunch is a Full Site Editing (FSE) theme for WordPress. FSE means you can visually edit every part of your website using the Gutenberg (the default WordPress editor) blocks.
With ReadyLaunch FSE, you can:
- Apply one of the seven global styles/presets to your entire website, or create a custom one;
- Edit headers and footers visually;
- Import and edit pre-built templates and patterns;
- Create custom page templates;
- Design pages and posts with drag-and-drop blocks;
- Preview changes before publishing;
- Automatically style ReadyLaunch blocks from the MemberPress plugin.
To use the ReadyLaunch theme, you must download it from the WordPress theme directory and install it on your website.
ReadyLaunch Theme Installation
Once your WordPress website is set up, you should install and activate the ReadyLaunch theme and add your content.
Before you start, it’s useful to prepare some basics:
- Have your logo ready for upload;
- Prepare your brand/website colors (e.g. HEX code of each of your brand/website colors).
In addition, if you’re activating the ReadyLaunch theme on a website that has existing content, the following preparations are advisable:
- Back up your current website;
- Deactivate unnecessary plugins;
- Update WordPress to the latest version.
Finally, ensure your website meets these requirements:
- HTTPS support is recommended.
- WordPress 6.0 or higher;
- PHP 7.4 or higher;
- MySQL 5.6 or higher;
- 128MB memory limit;
Website Basics With ReadyLaunch Theme
Now that your ReadyLaunch theme is activated, you can start customizing it and adding your content.
Brand Basics
You can start with the basics of your website brand (site title, tagline, and icon) under General WordPress settings.
Follow these steps to configure your brand basics:
- Navigate to Dashboard > Settings > General.
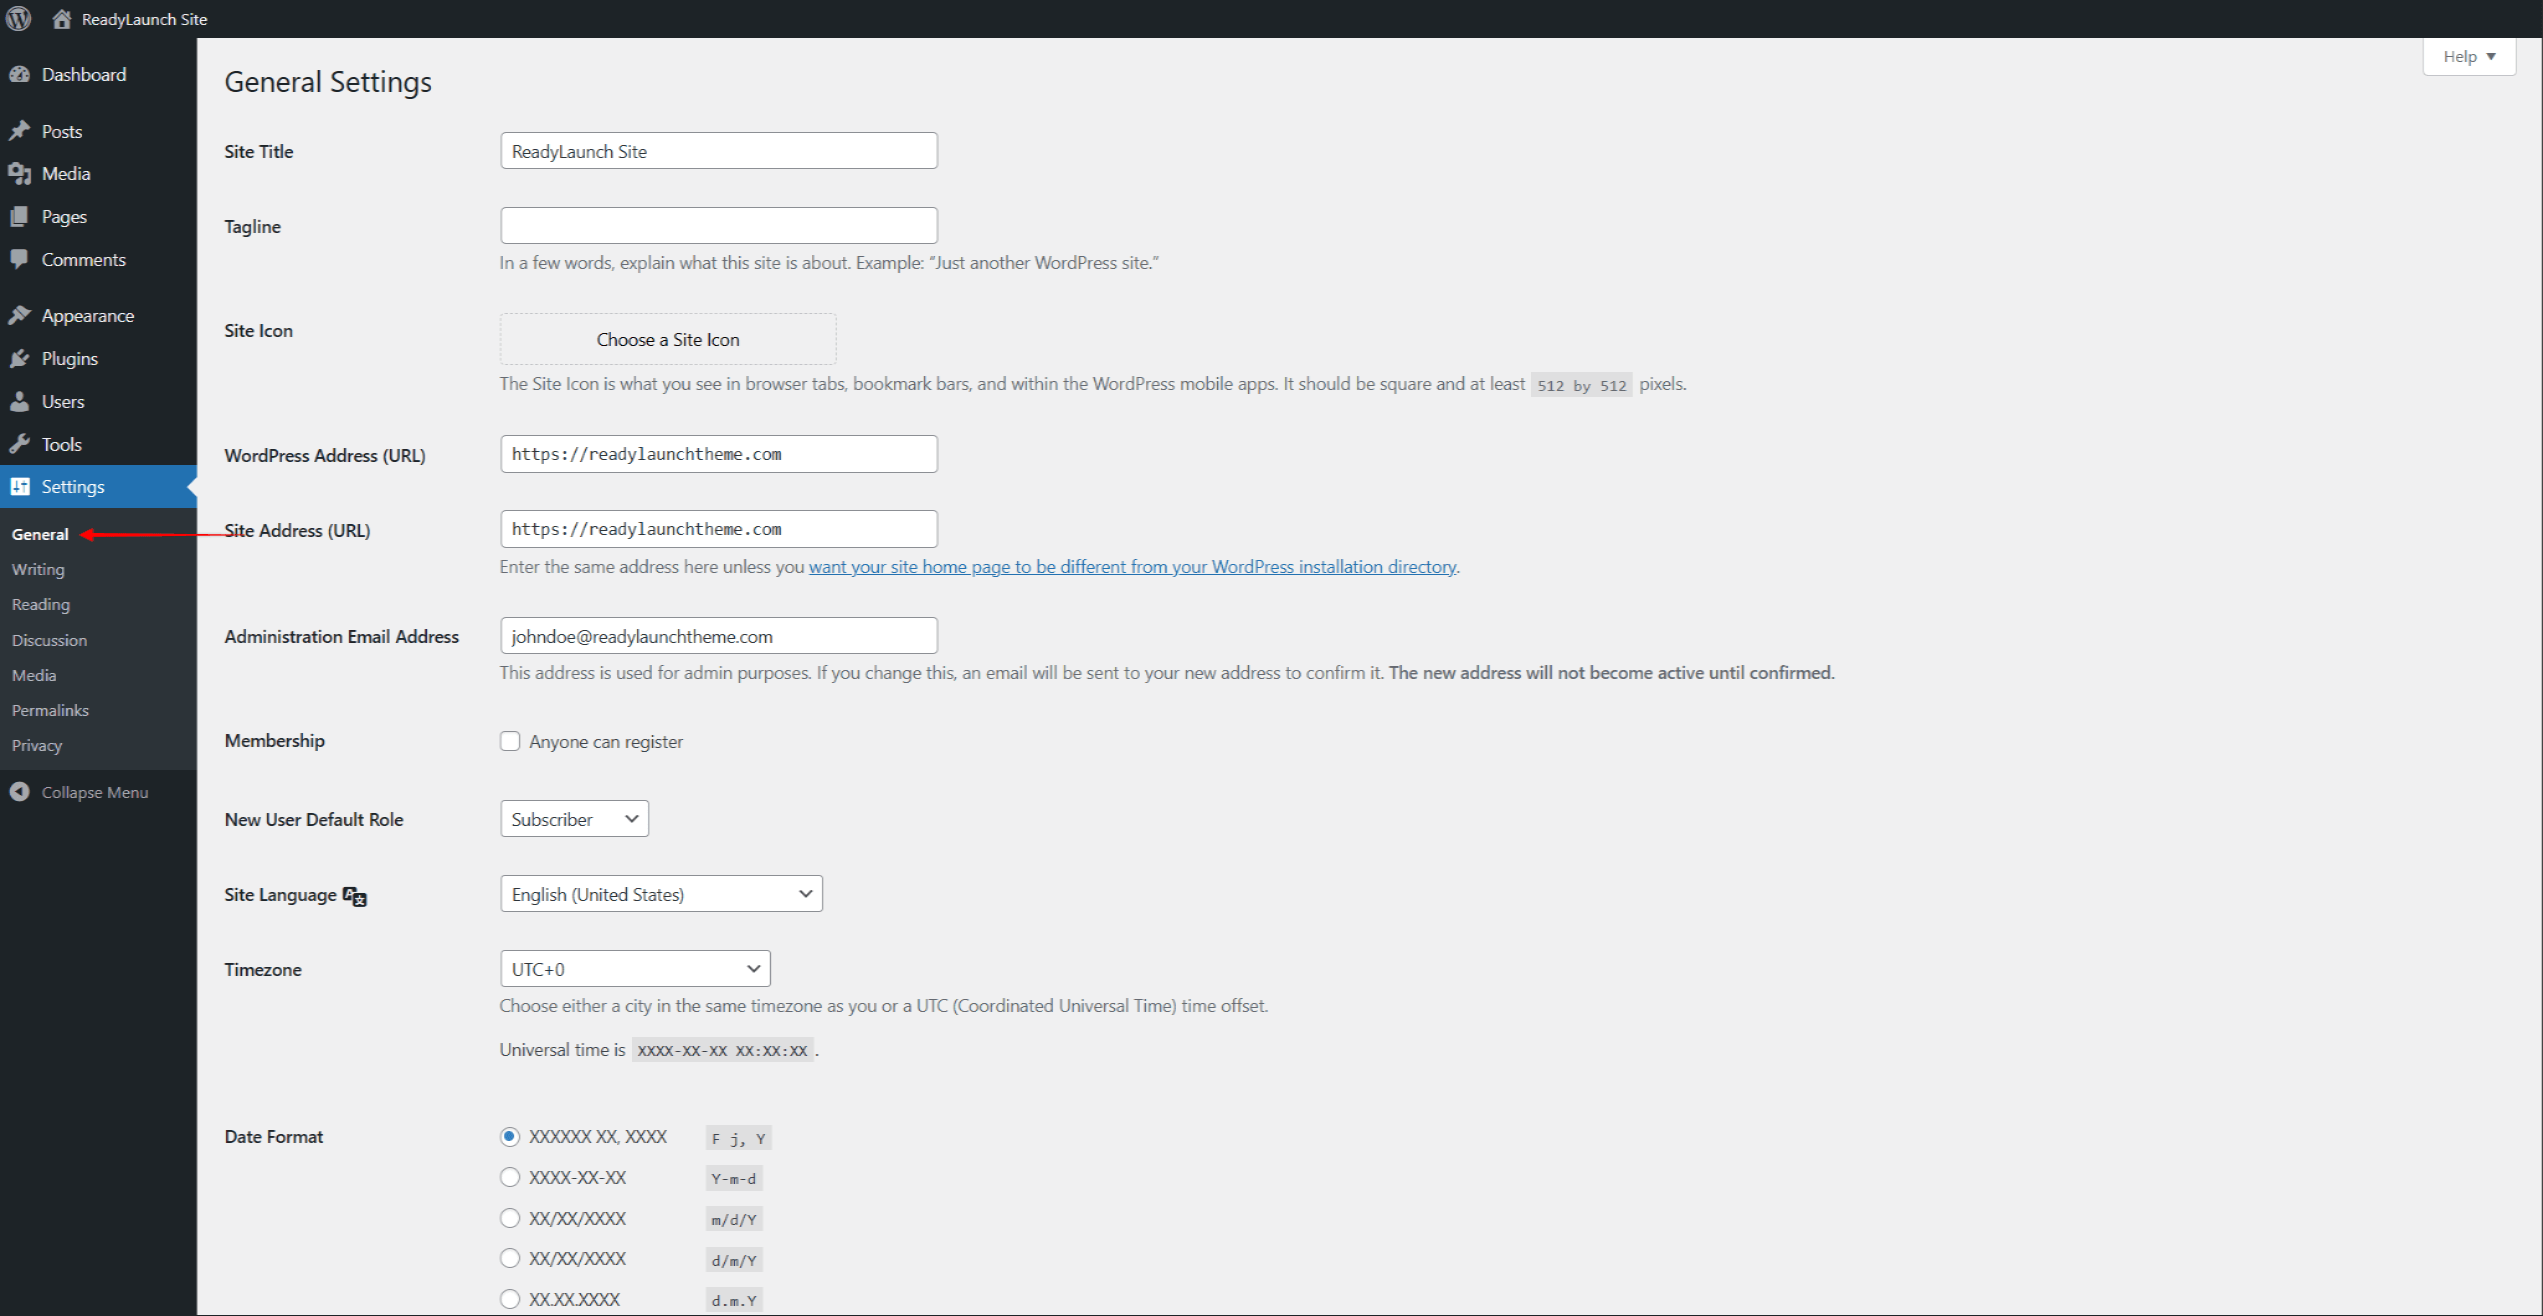
- Under Site Title, add the name of your website.
- Optionally, under the Tagline option, you can also add a short description, slogan, or catchphrase for your website.
- Set Site Icon (browser icon):
- Click Choose a Site Icon;
- Click Select Files to upload an image, or choose one from the Media Library. The icon image should be square and at least 512×512 pixels in size;
- Click the Set as Site Icon button.
- Click Save Changes at the bottom of the page.
Site Editor
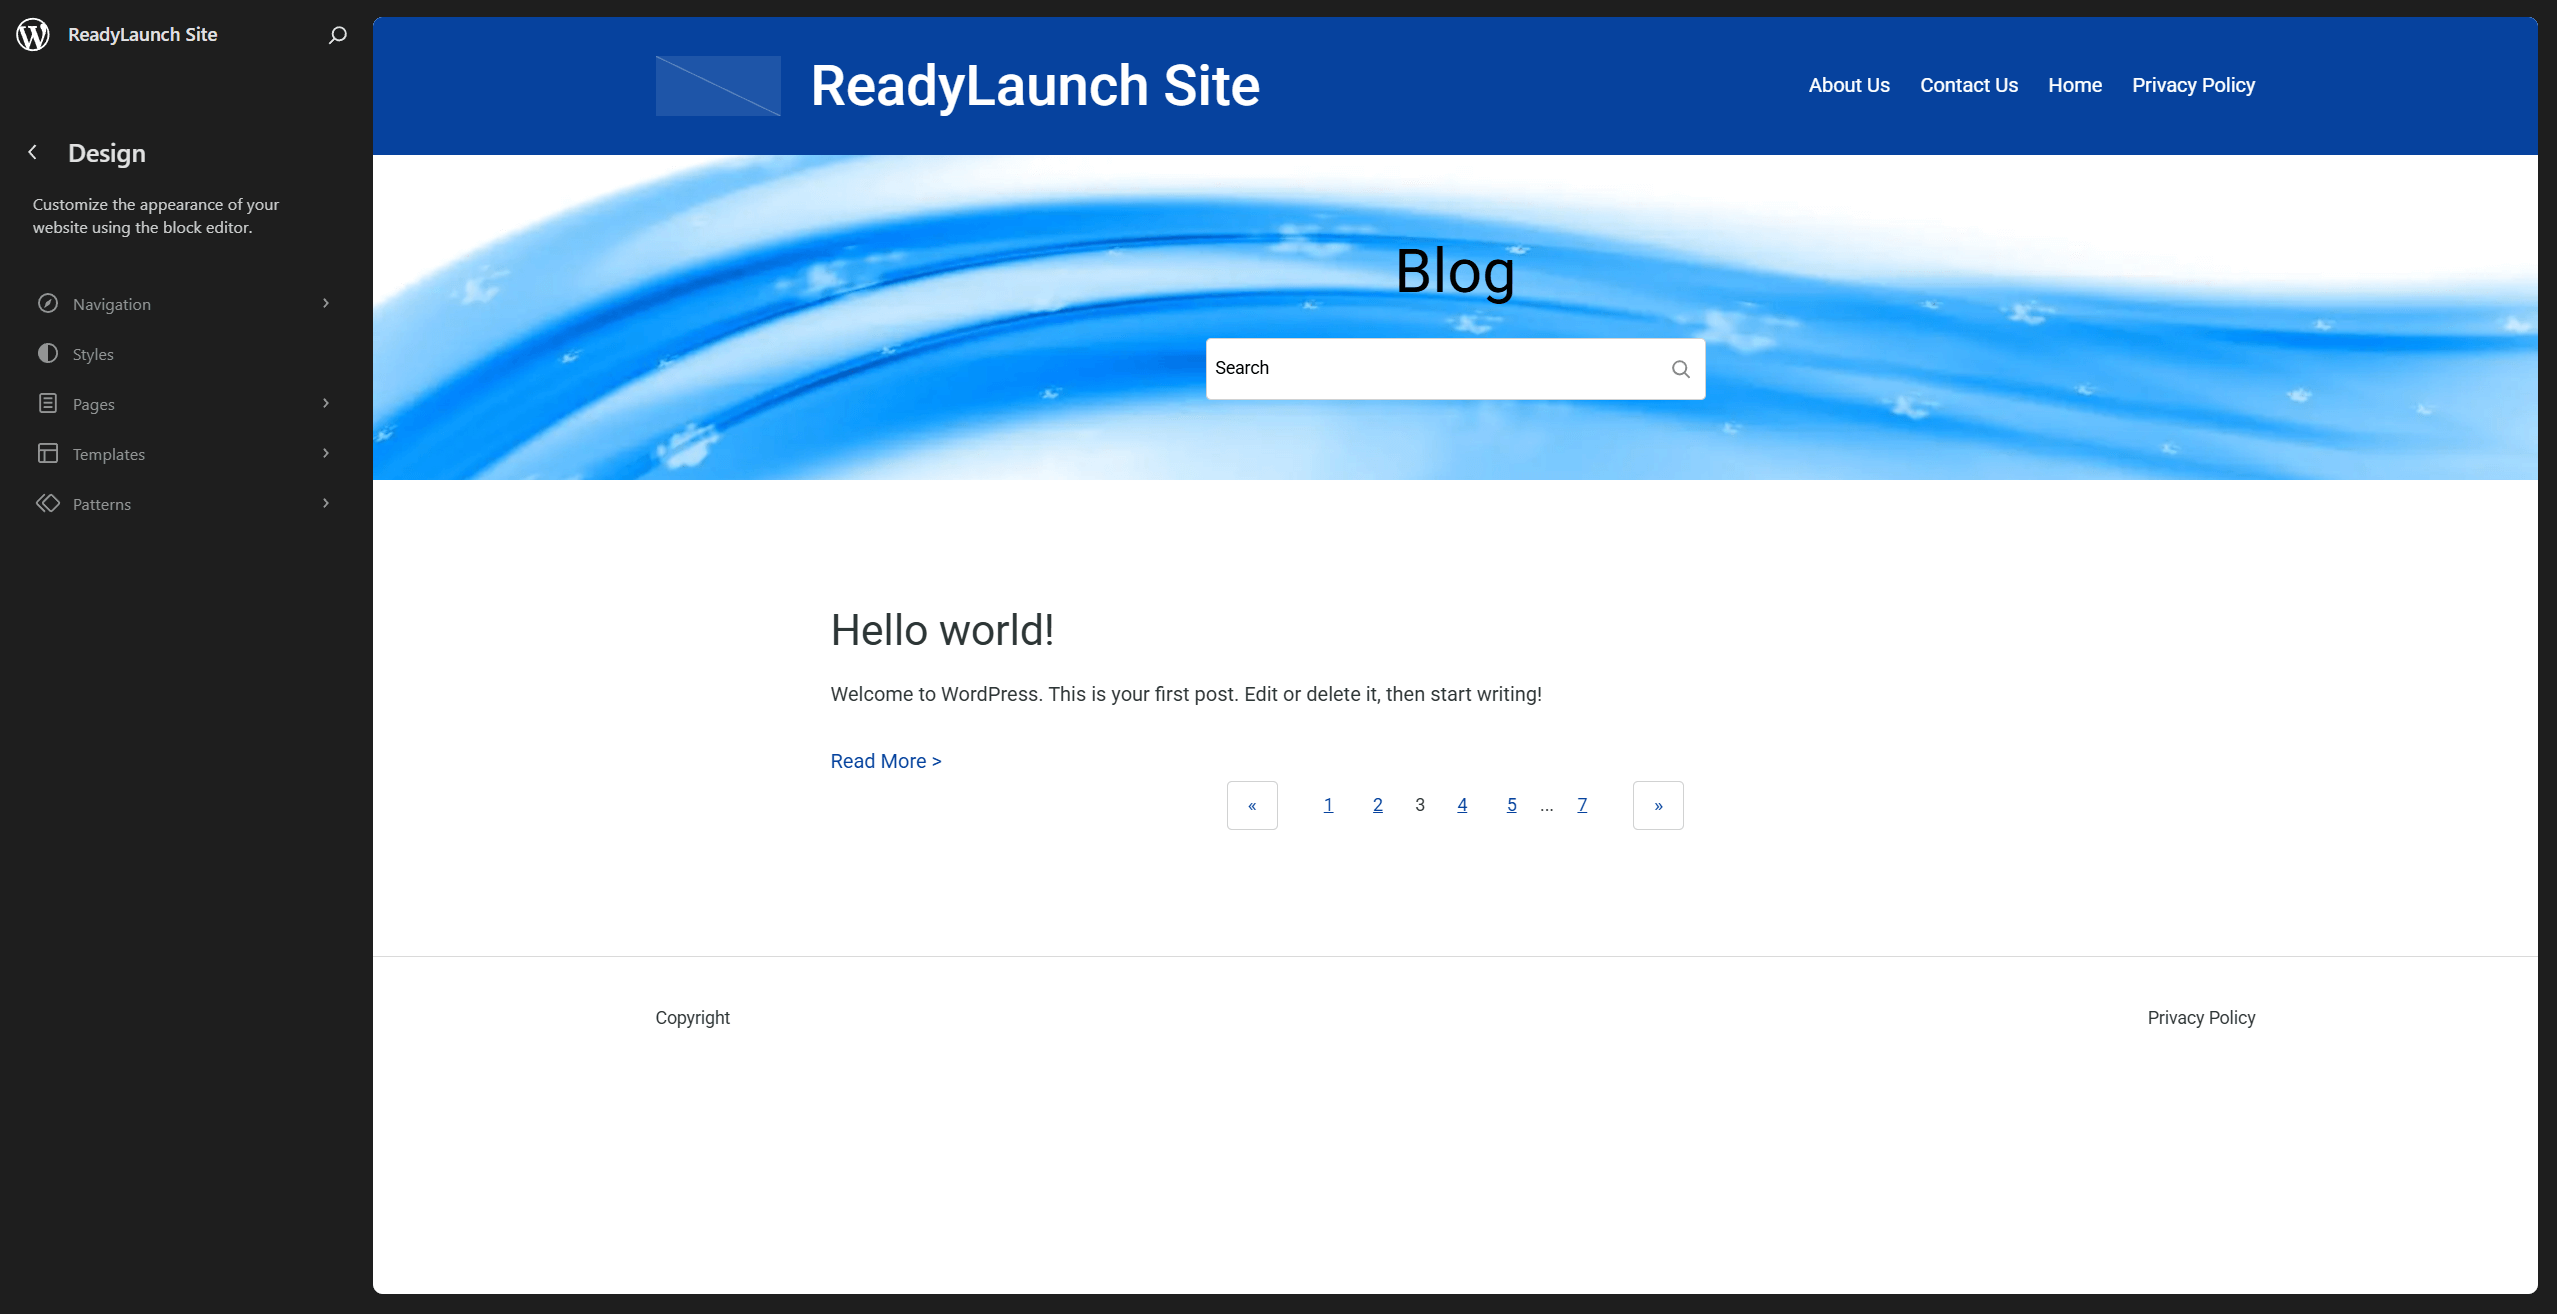
Once you’re done with brand basics, you can navigate to Dashboard > Appearance > Editor to access the Site Editor.
Here, you can modify your website’s styling, and visually edit pre-built templates and patterns, or create custom ones.
On the left side of the site editor is the navigation menu. The right side gives you a real-time preview of your website.
Header And Footer
The header and the footer are special areas of your website. These areas are present on every page and post of your website.
The header is the area located at the top of every page. It typically includes your logo, site title, and primary menu. You can also add other content here.
On the contrary, the footer is the area located at the bottom of every page. It typically includes your terms and conditions, privacy policy, and links related to your business. You can also add other content and links that you consider essential to show on every page.
By default, when activated, the ReadyLaunch theme will apply the default header and footer. The default ReadyLaunch header and footer are editable template parts applied to all your pages and posts.
You can modify your header and footer content and design by following these steps:
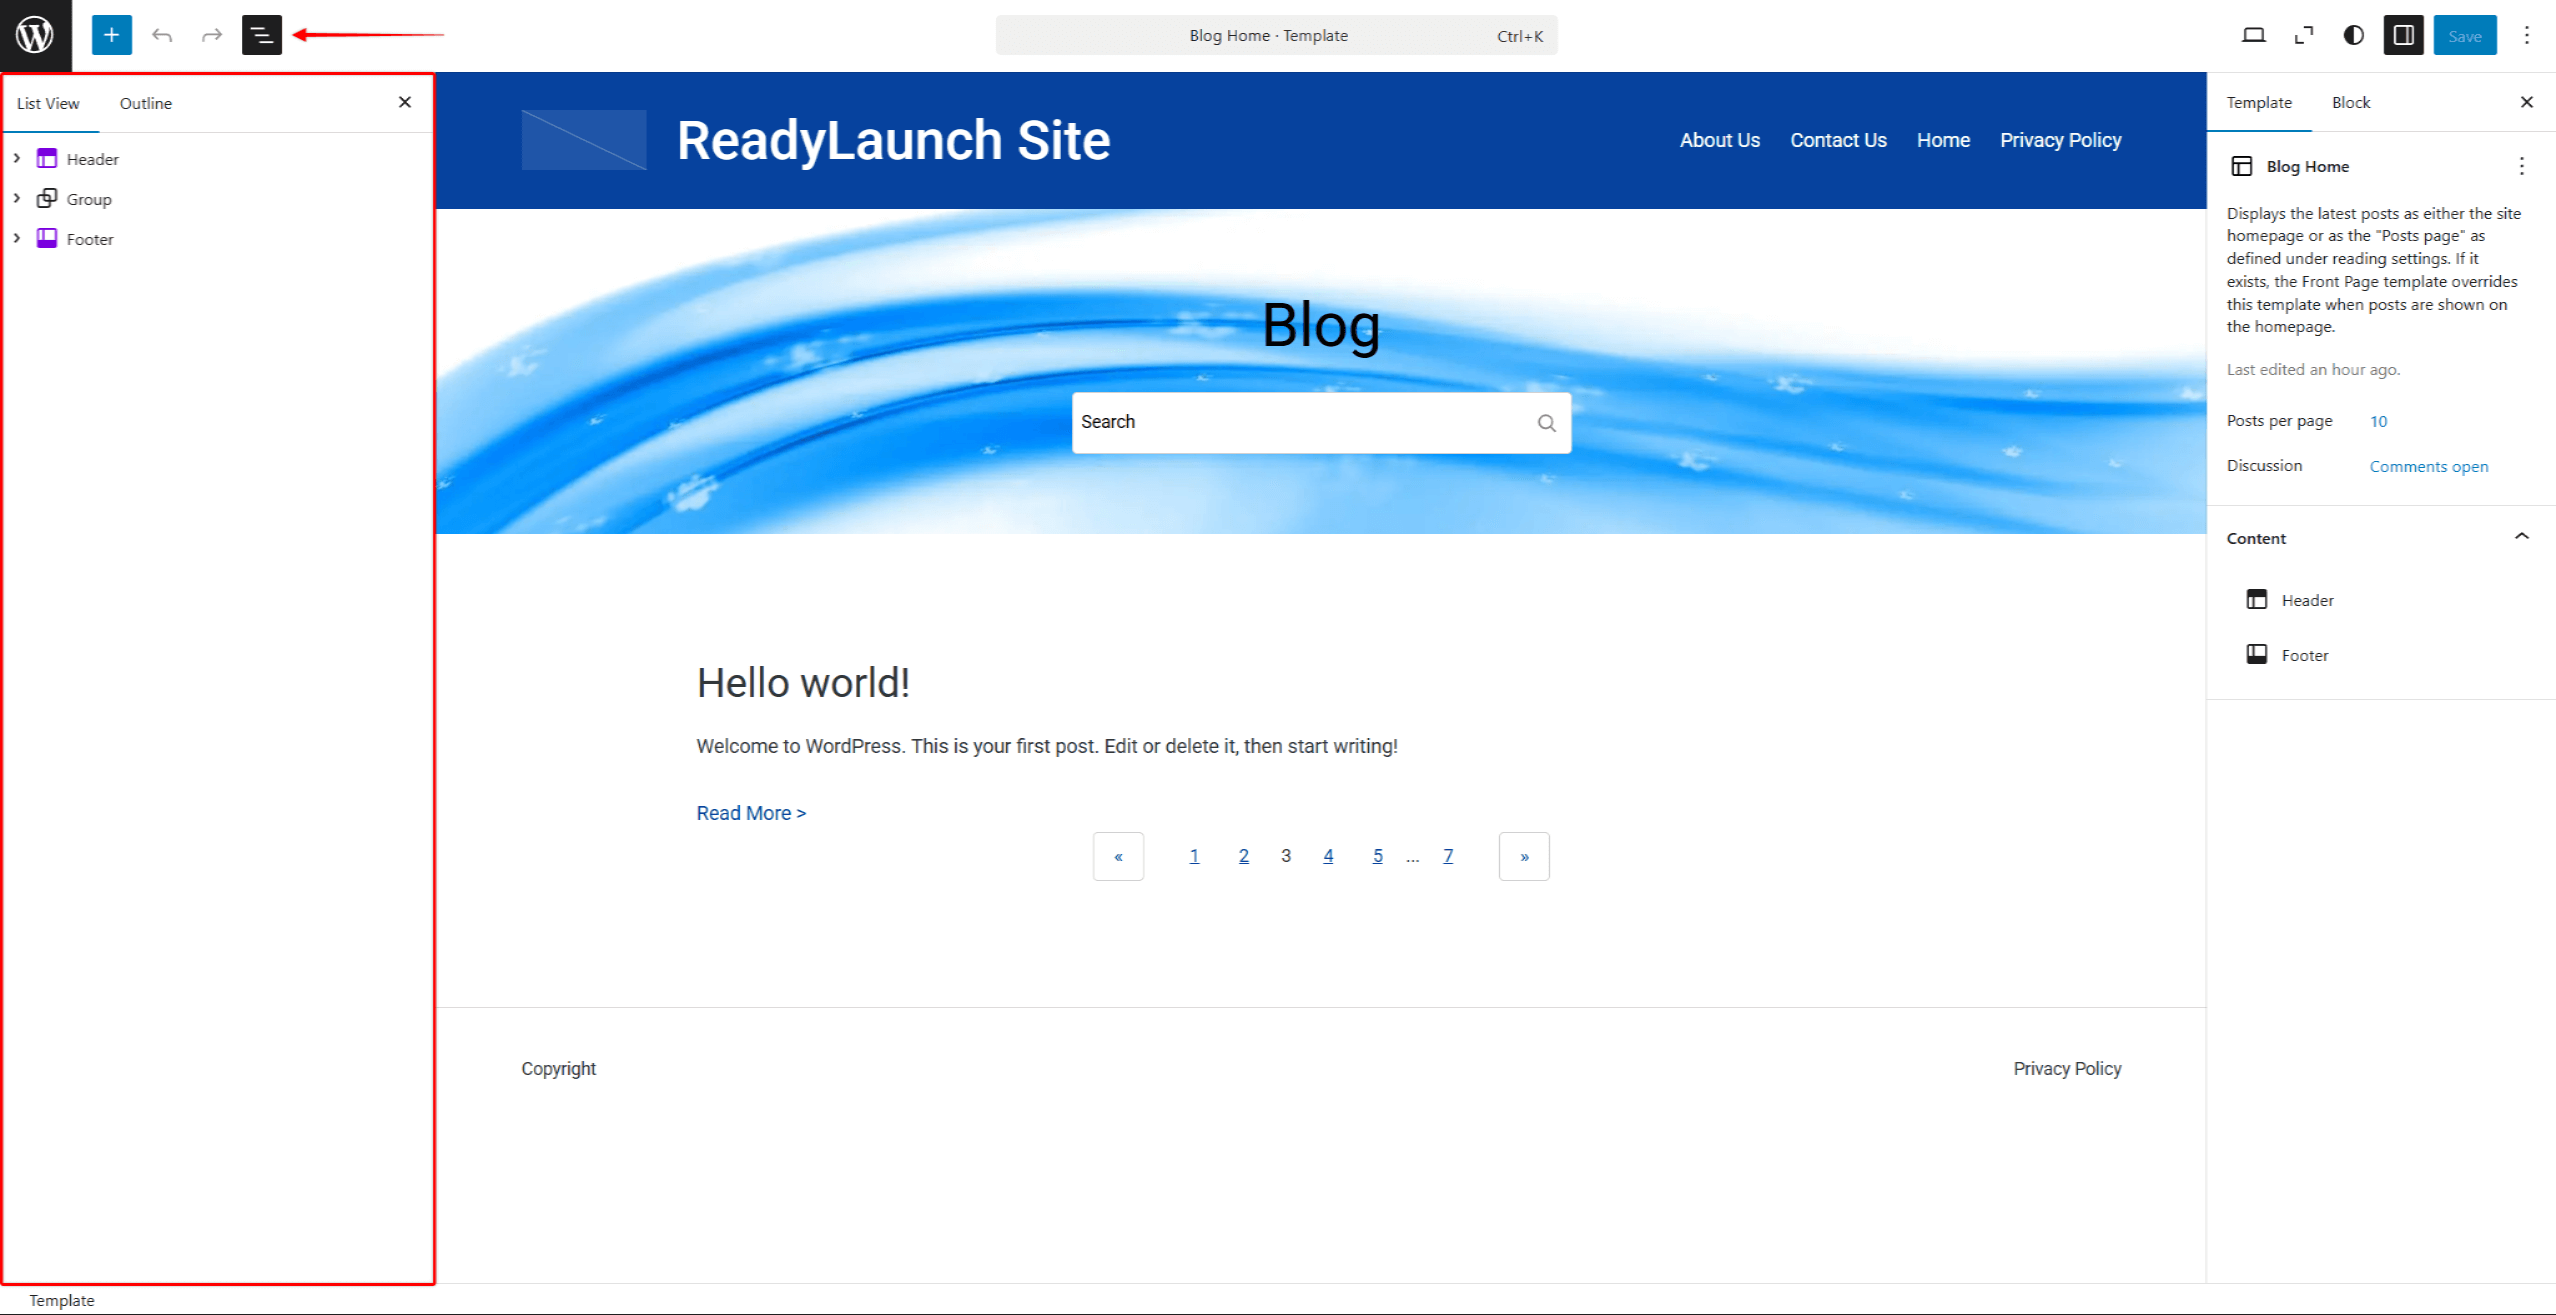
- Navigate to Dashboard > Appearance > Editor to open the Site editor.
- Click anywhere on your website preview to start editing. This will open the block editor, allowing you to edit the default (pre-built) header and footer template parts.
- Next, click directly on any element within the header or footer area that you wish to modify. Also, you can click on the Document Overview (3-dash) icon and select the desired block from the list.
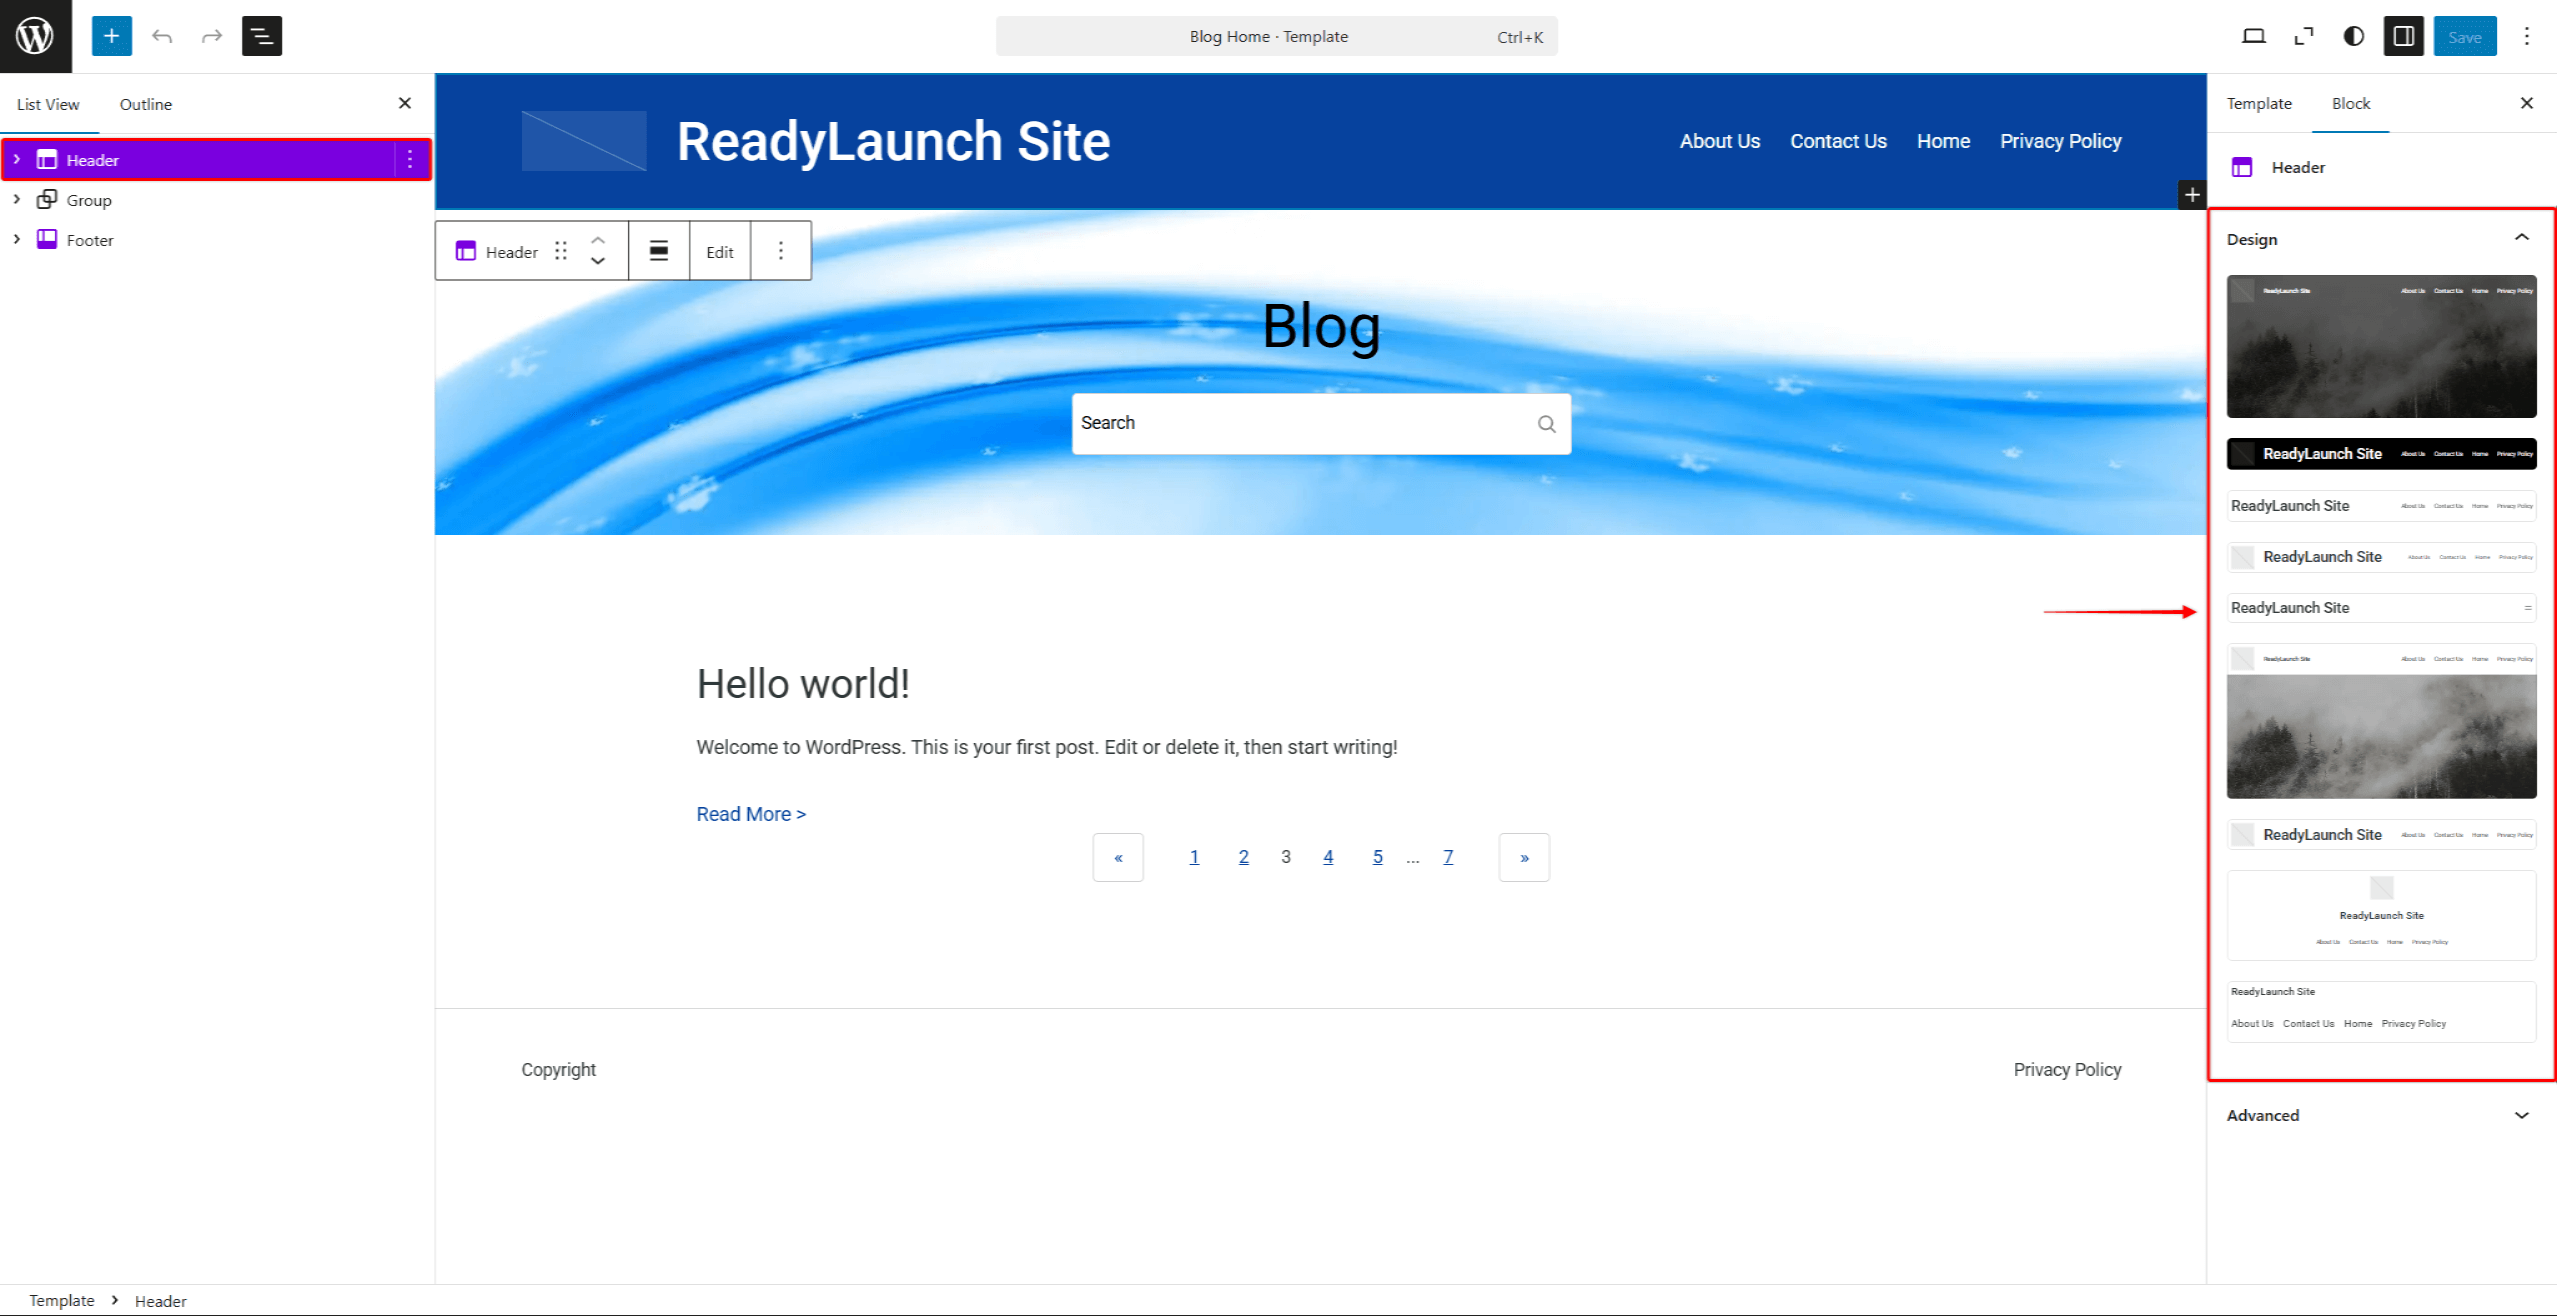
- To begin, select the Header block by clicking anywhere within the block or selecting it in the Document Overview panel. This will allow you to choose one of the available pre-built header designs or keep the default one. In addition, you can add or remove any block from your header.
- Next, click on the Site Logo block. Here, you can select the logo image by clicking “Choose logo”. Also, you can apply styling to your logo.
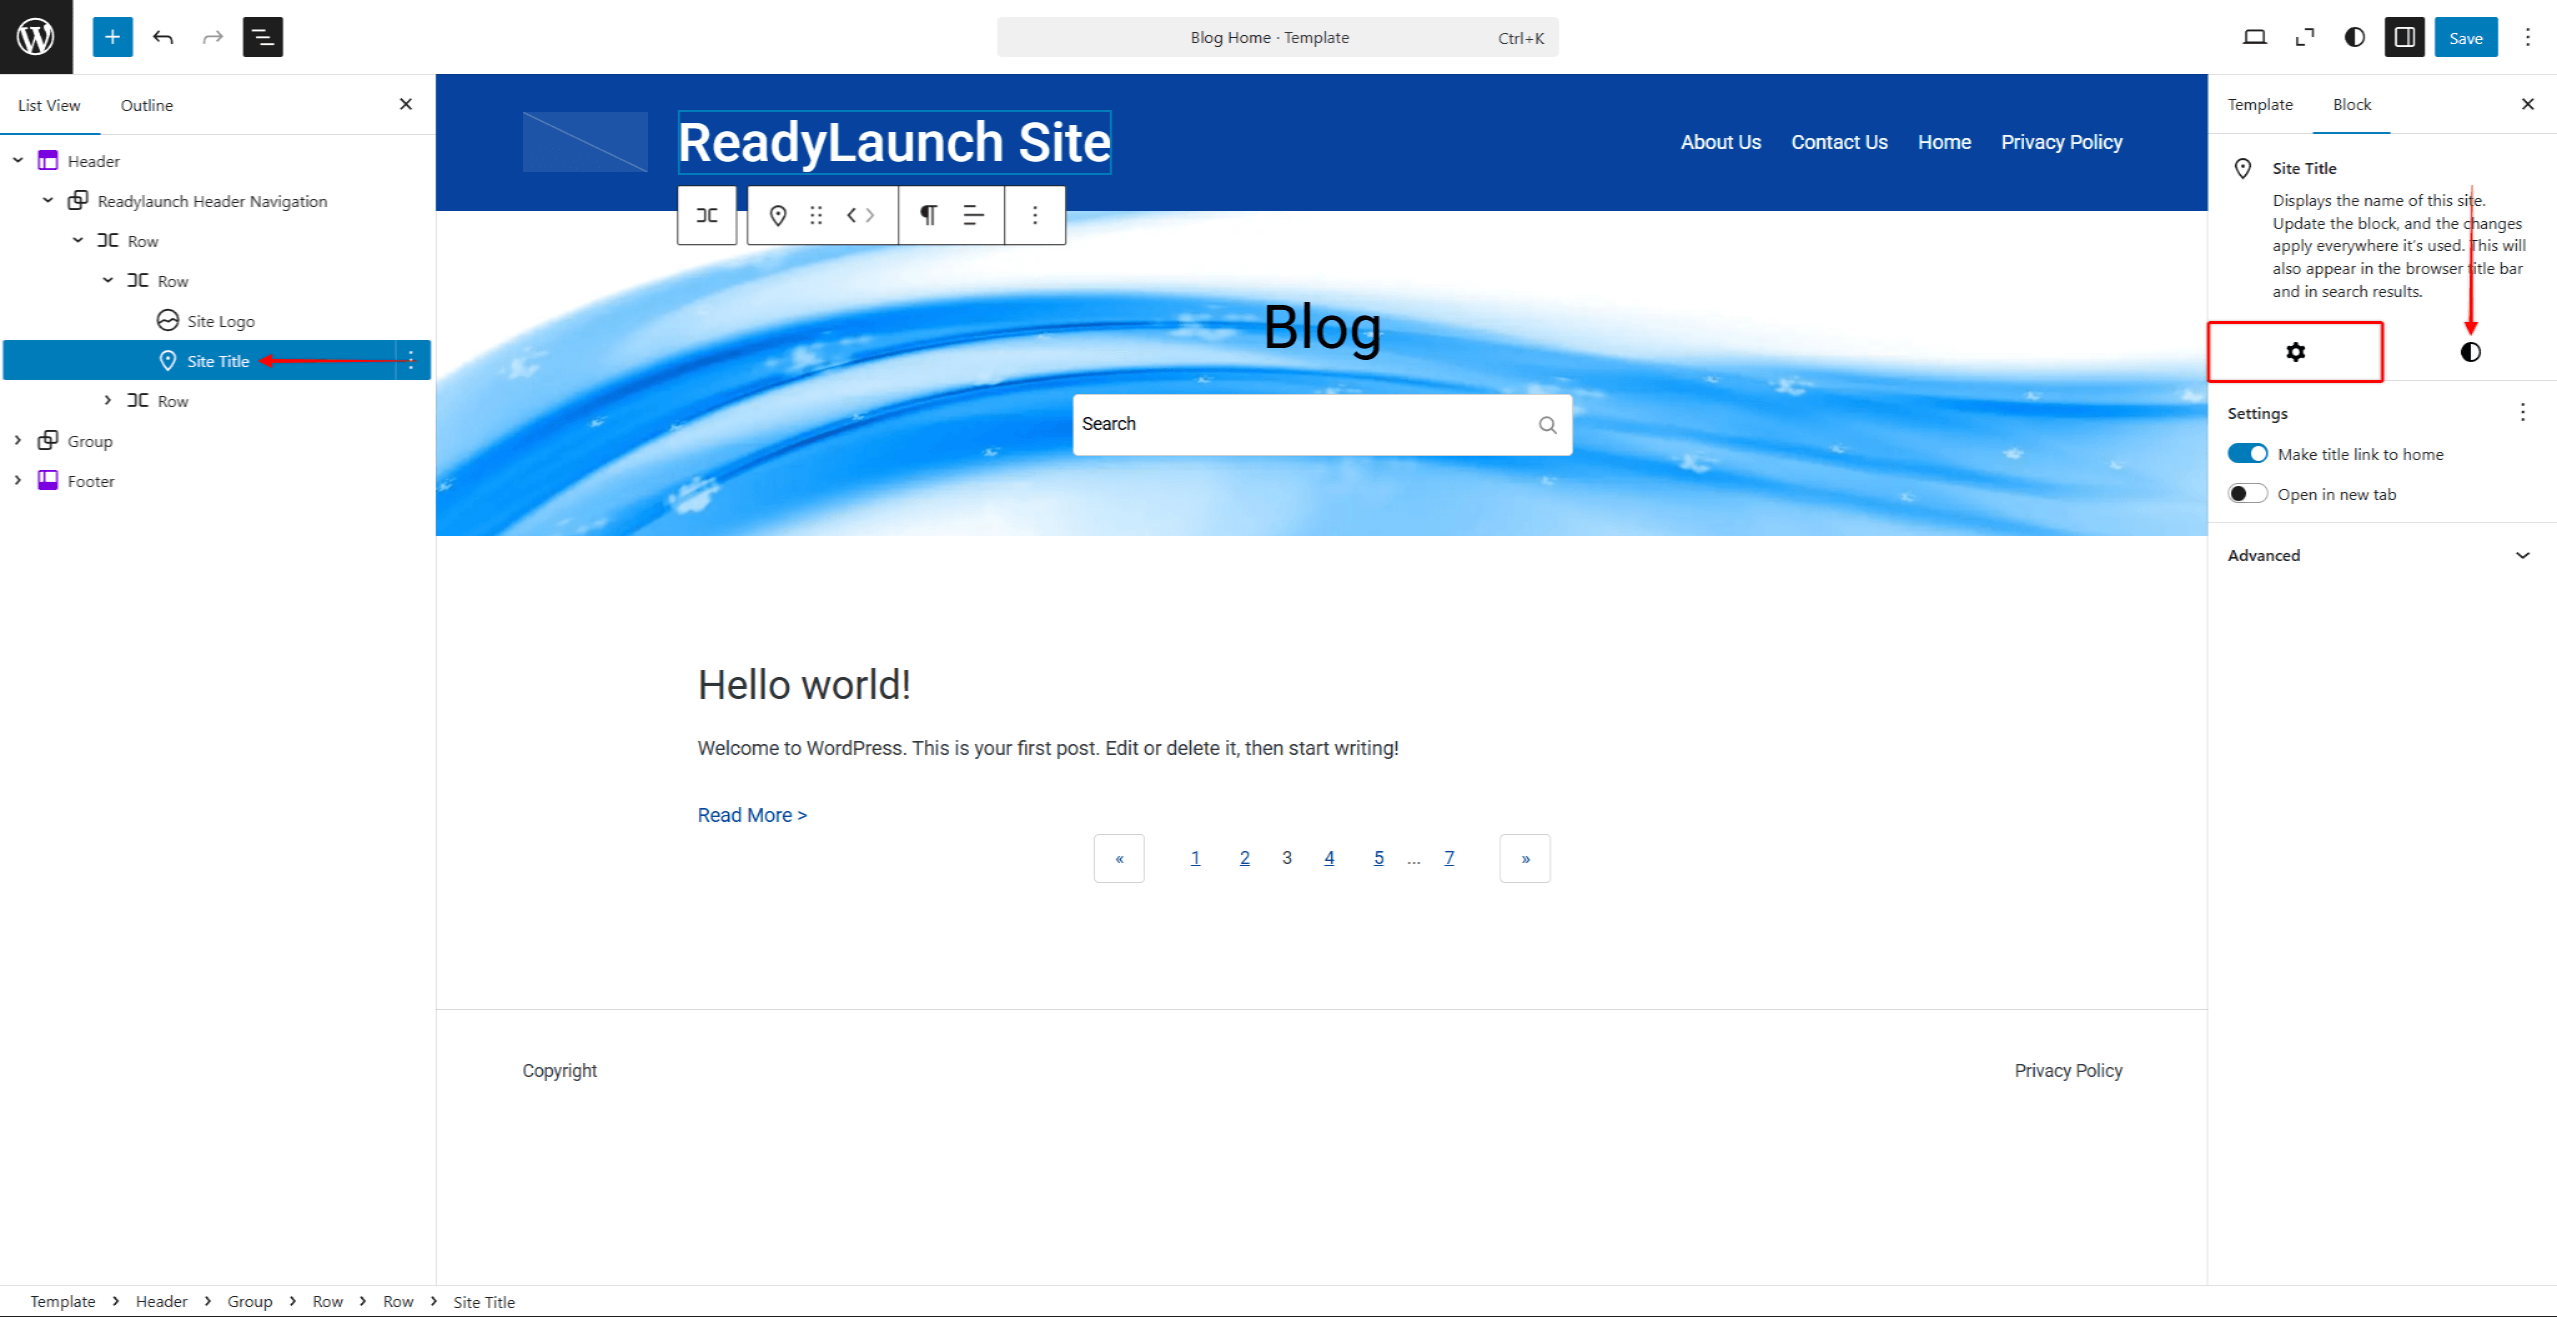
- Once your logo is set, click on the Site Title block. Apply settings and styling to your site title.
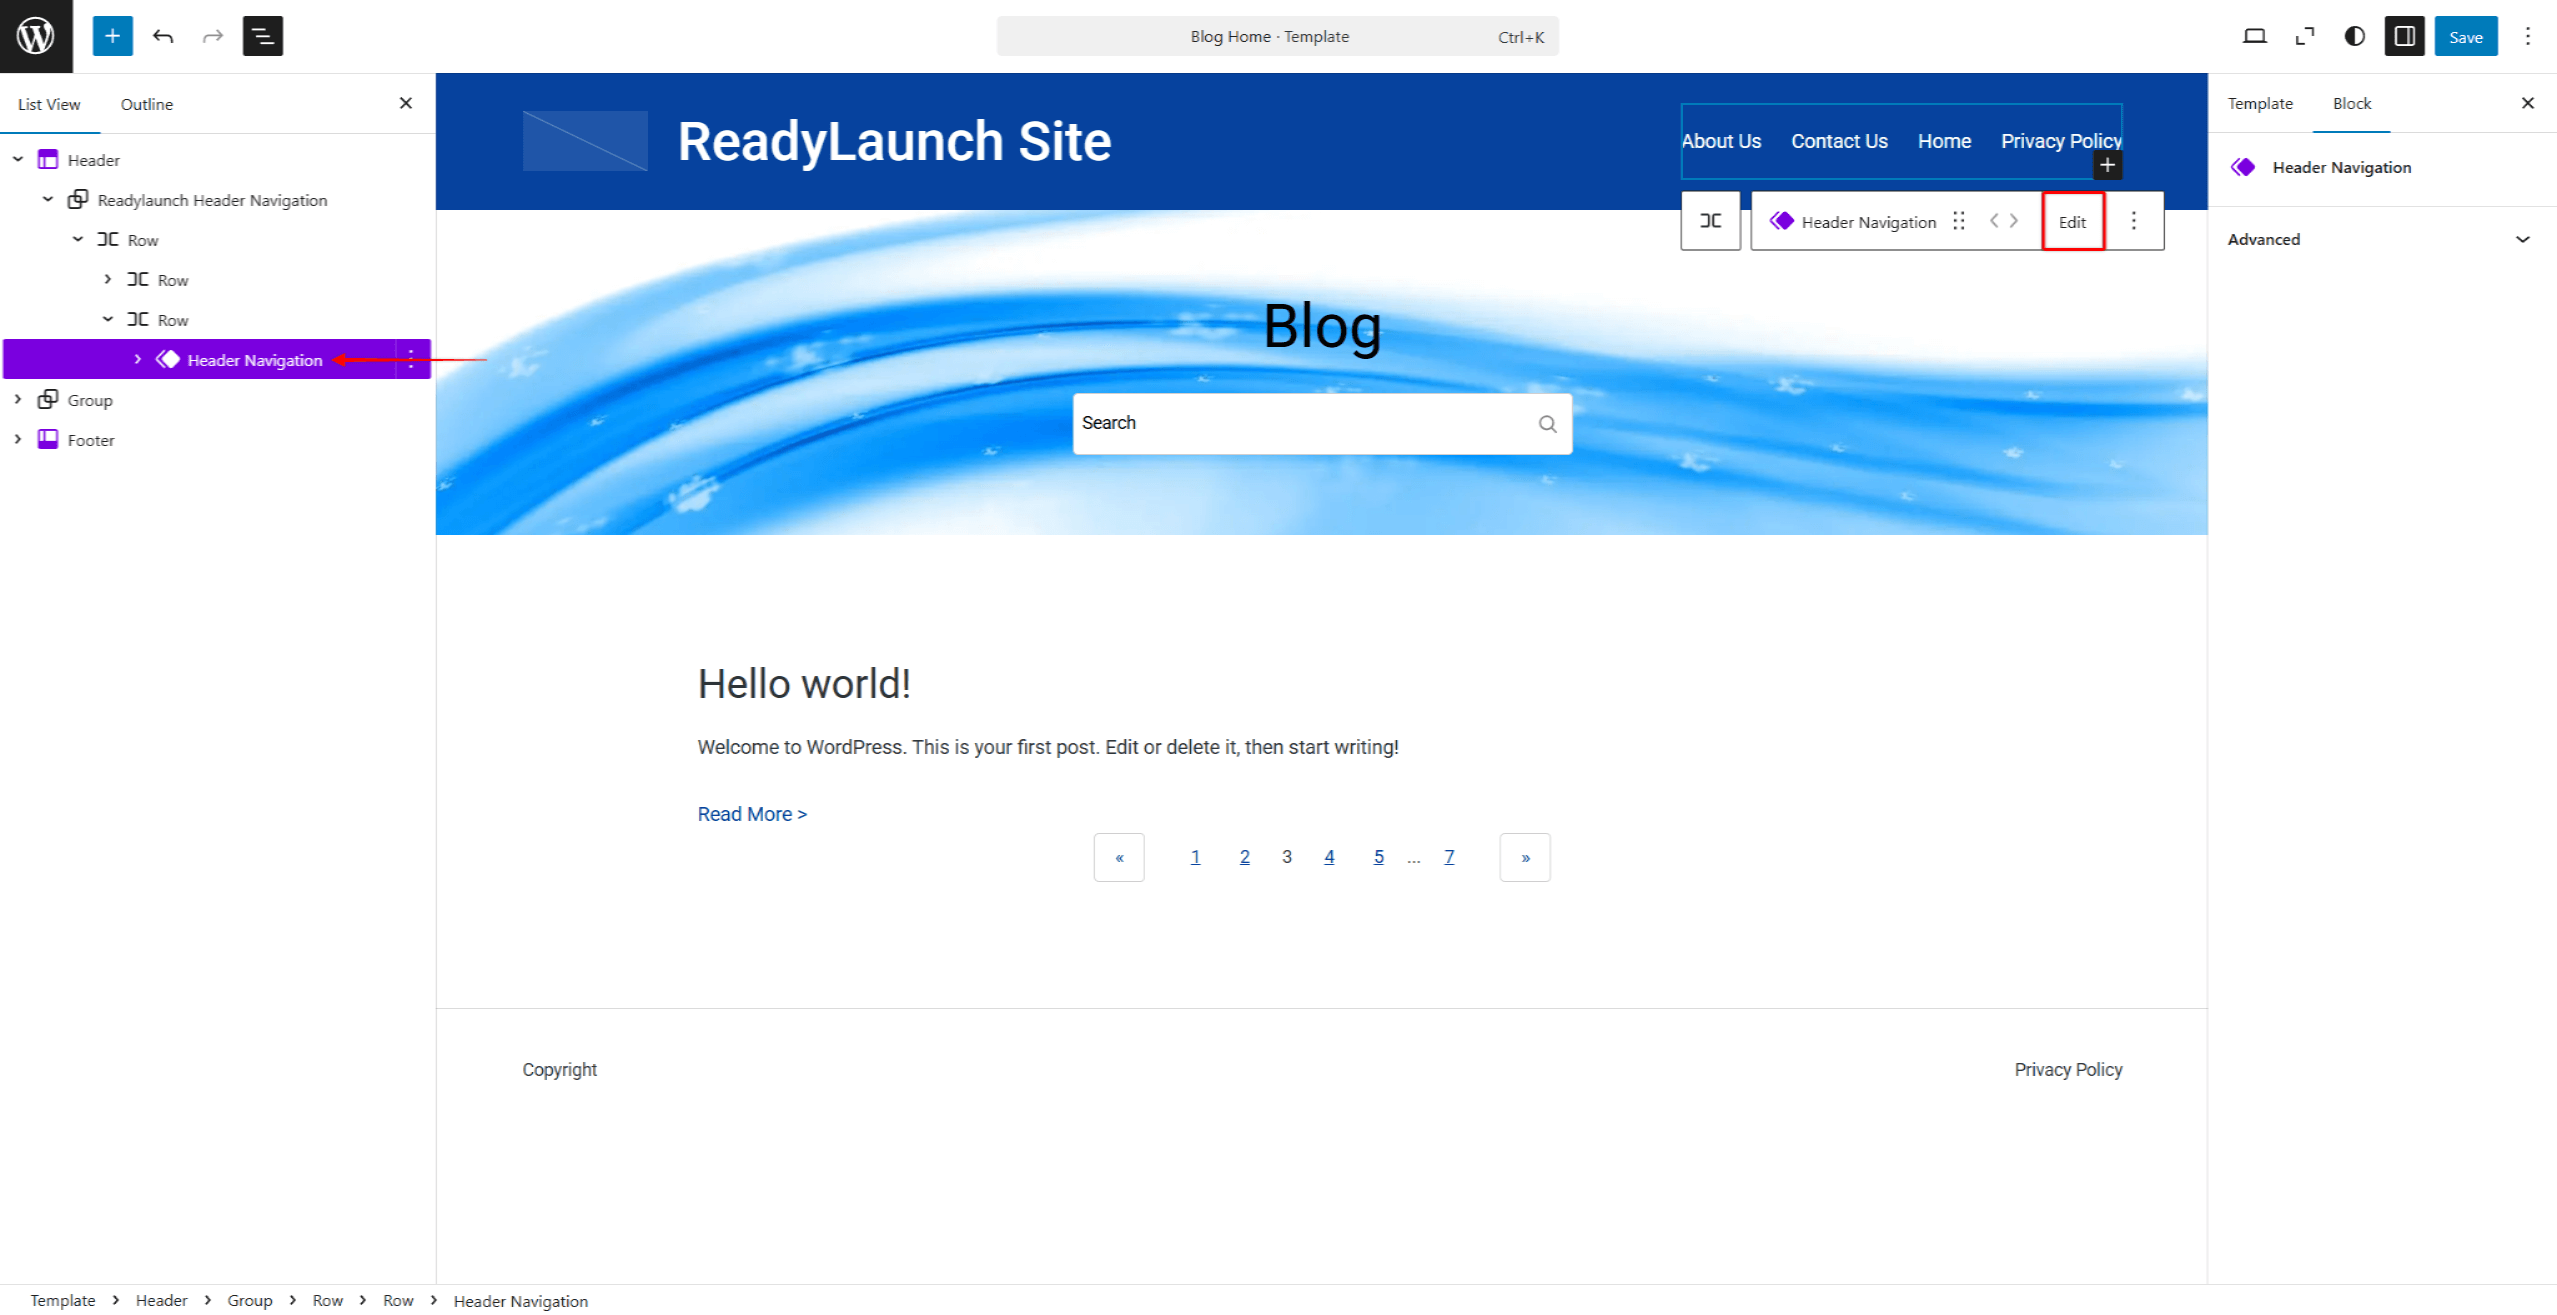
- Further, you should set your primary menu, which should contain links to your main pages. To do this, click on the Header Navigation block. In the block menu, click the Edit option to modify the Header Navigation template part.
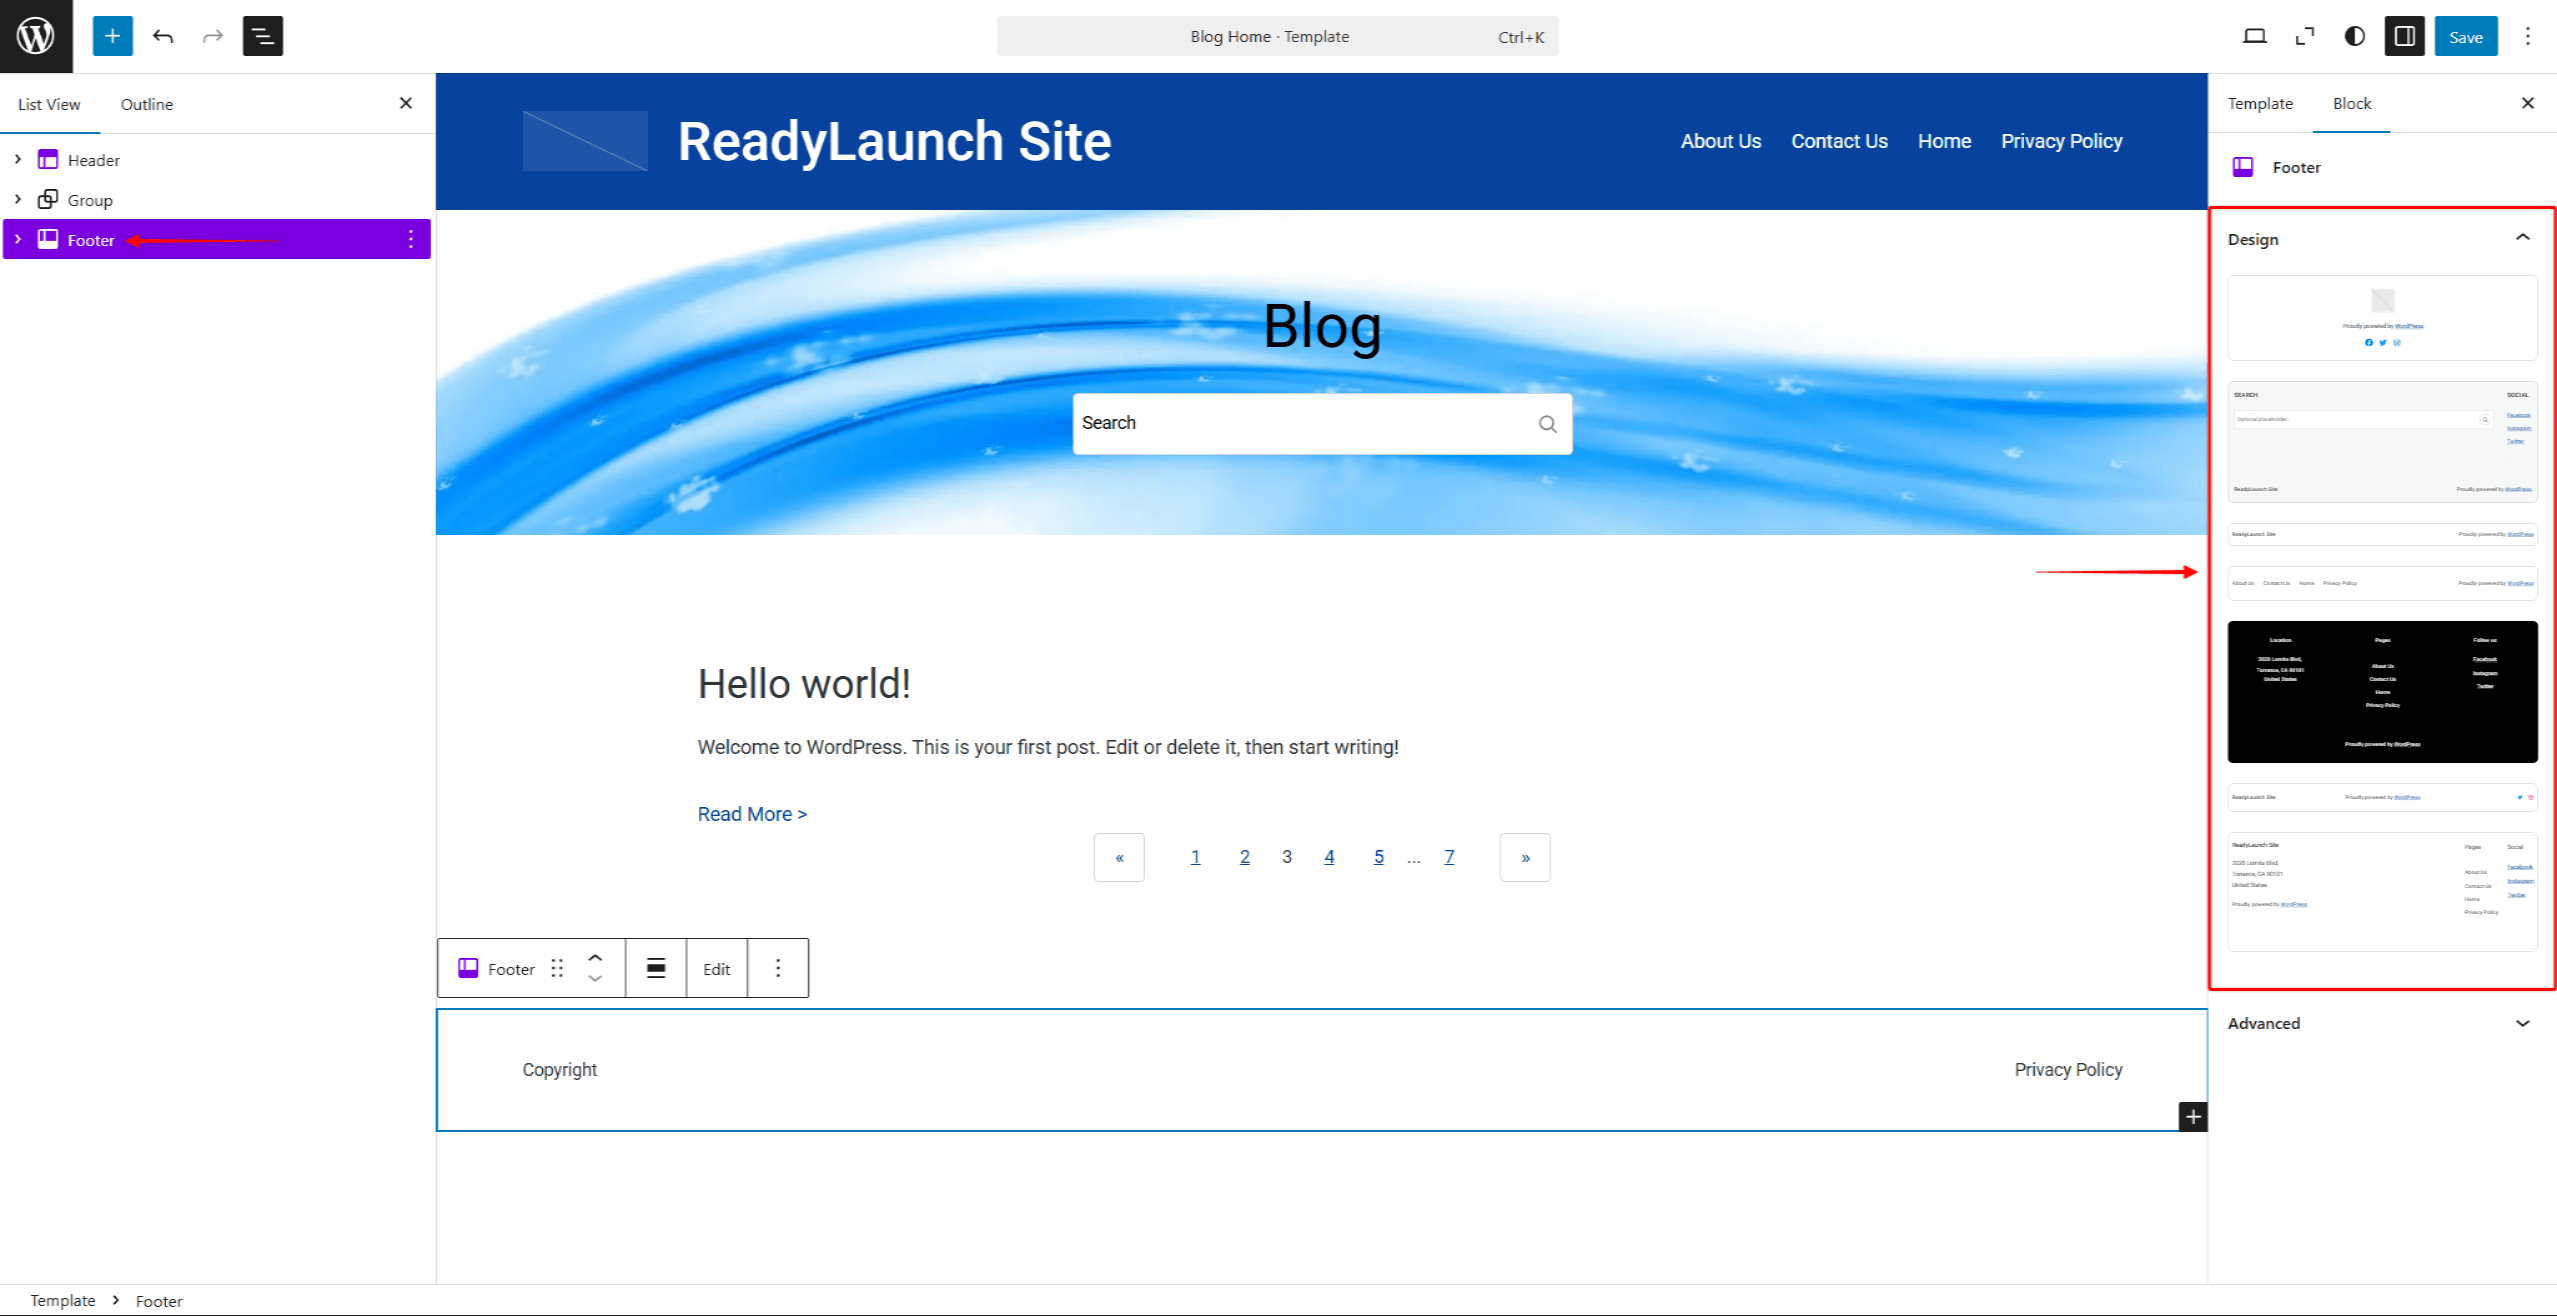
- Finally, click on the Footer block. Here, you can choose one of the available pre-built footer designs or keep the default one. Similarly to the header, you can add or remove any block from your footer.
- Once you have made modifications to your header and footer, click the Save button to apply the changes.
Styles
Next, set your website’s colors, typography, and other styling elements:
- Navigate to Dashboard > Appearance > Editor, and click on the Styles option in the left-side menu.
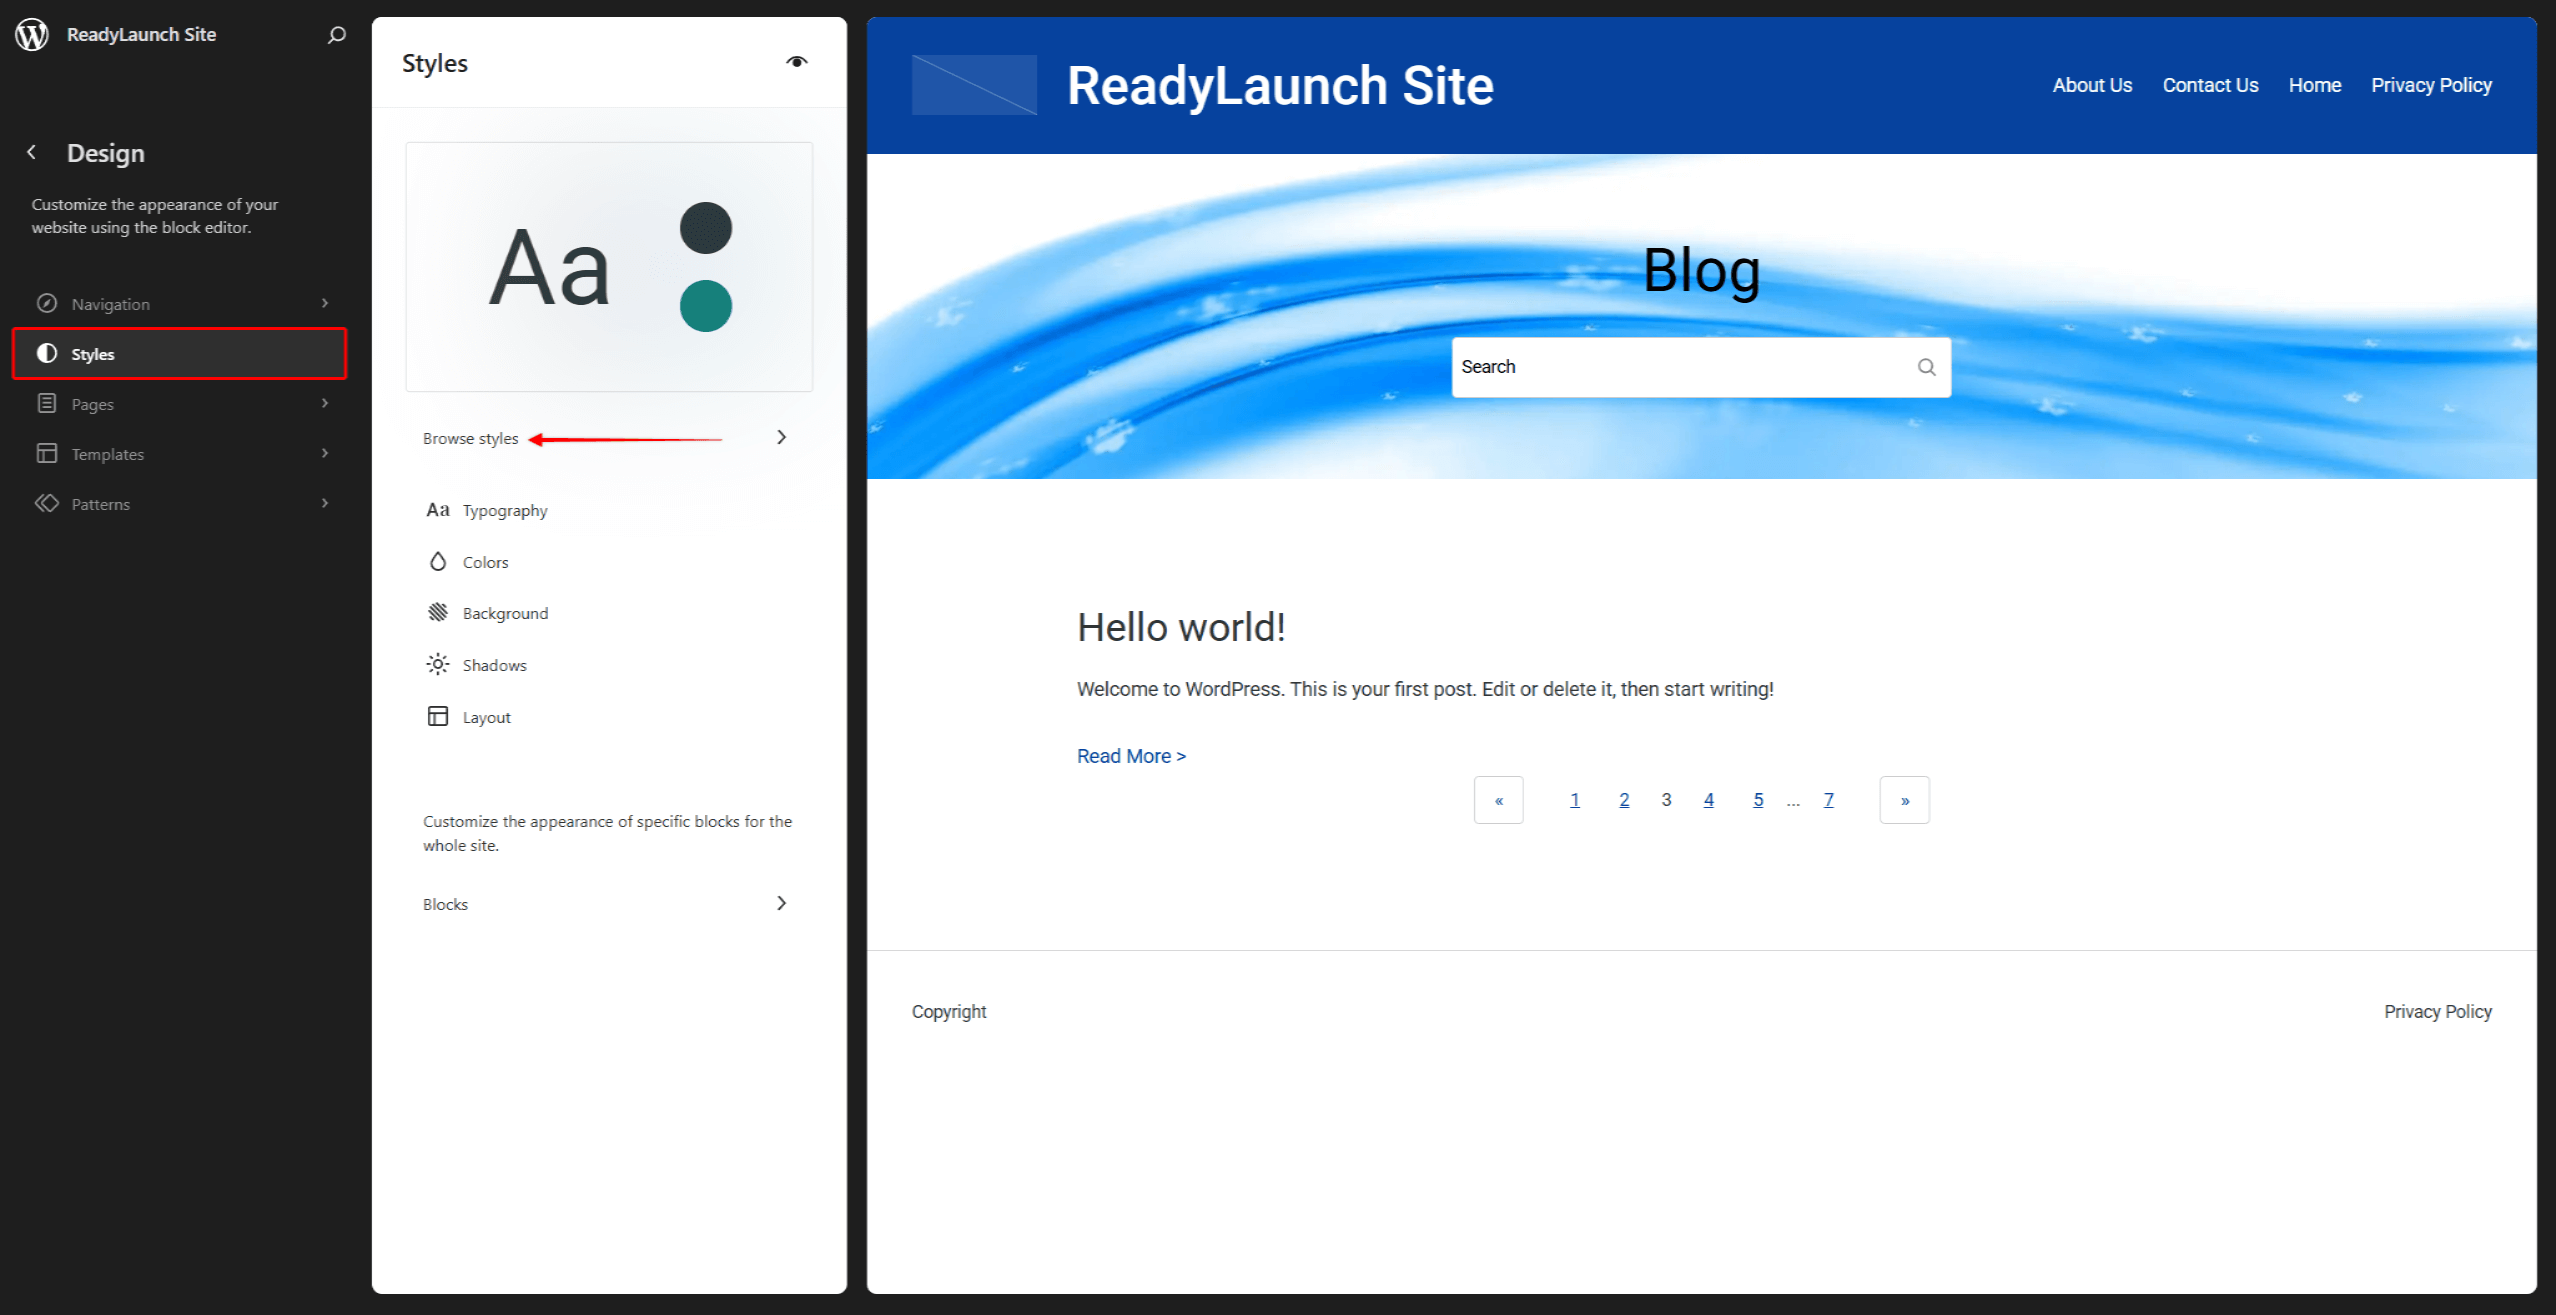
- The ReadyLaunch theme comes with preset styles. Click the Browse Styles link to preview and select one of the available preset styles.
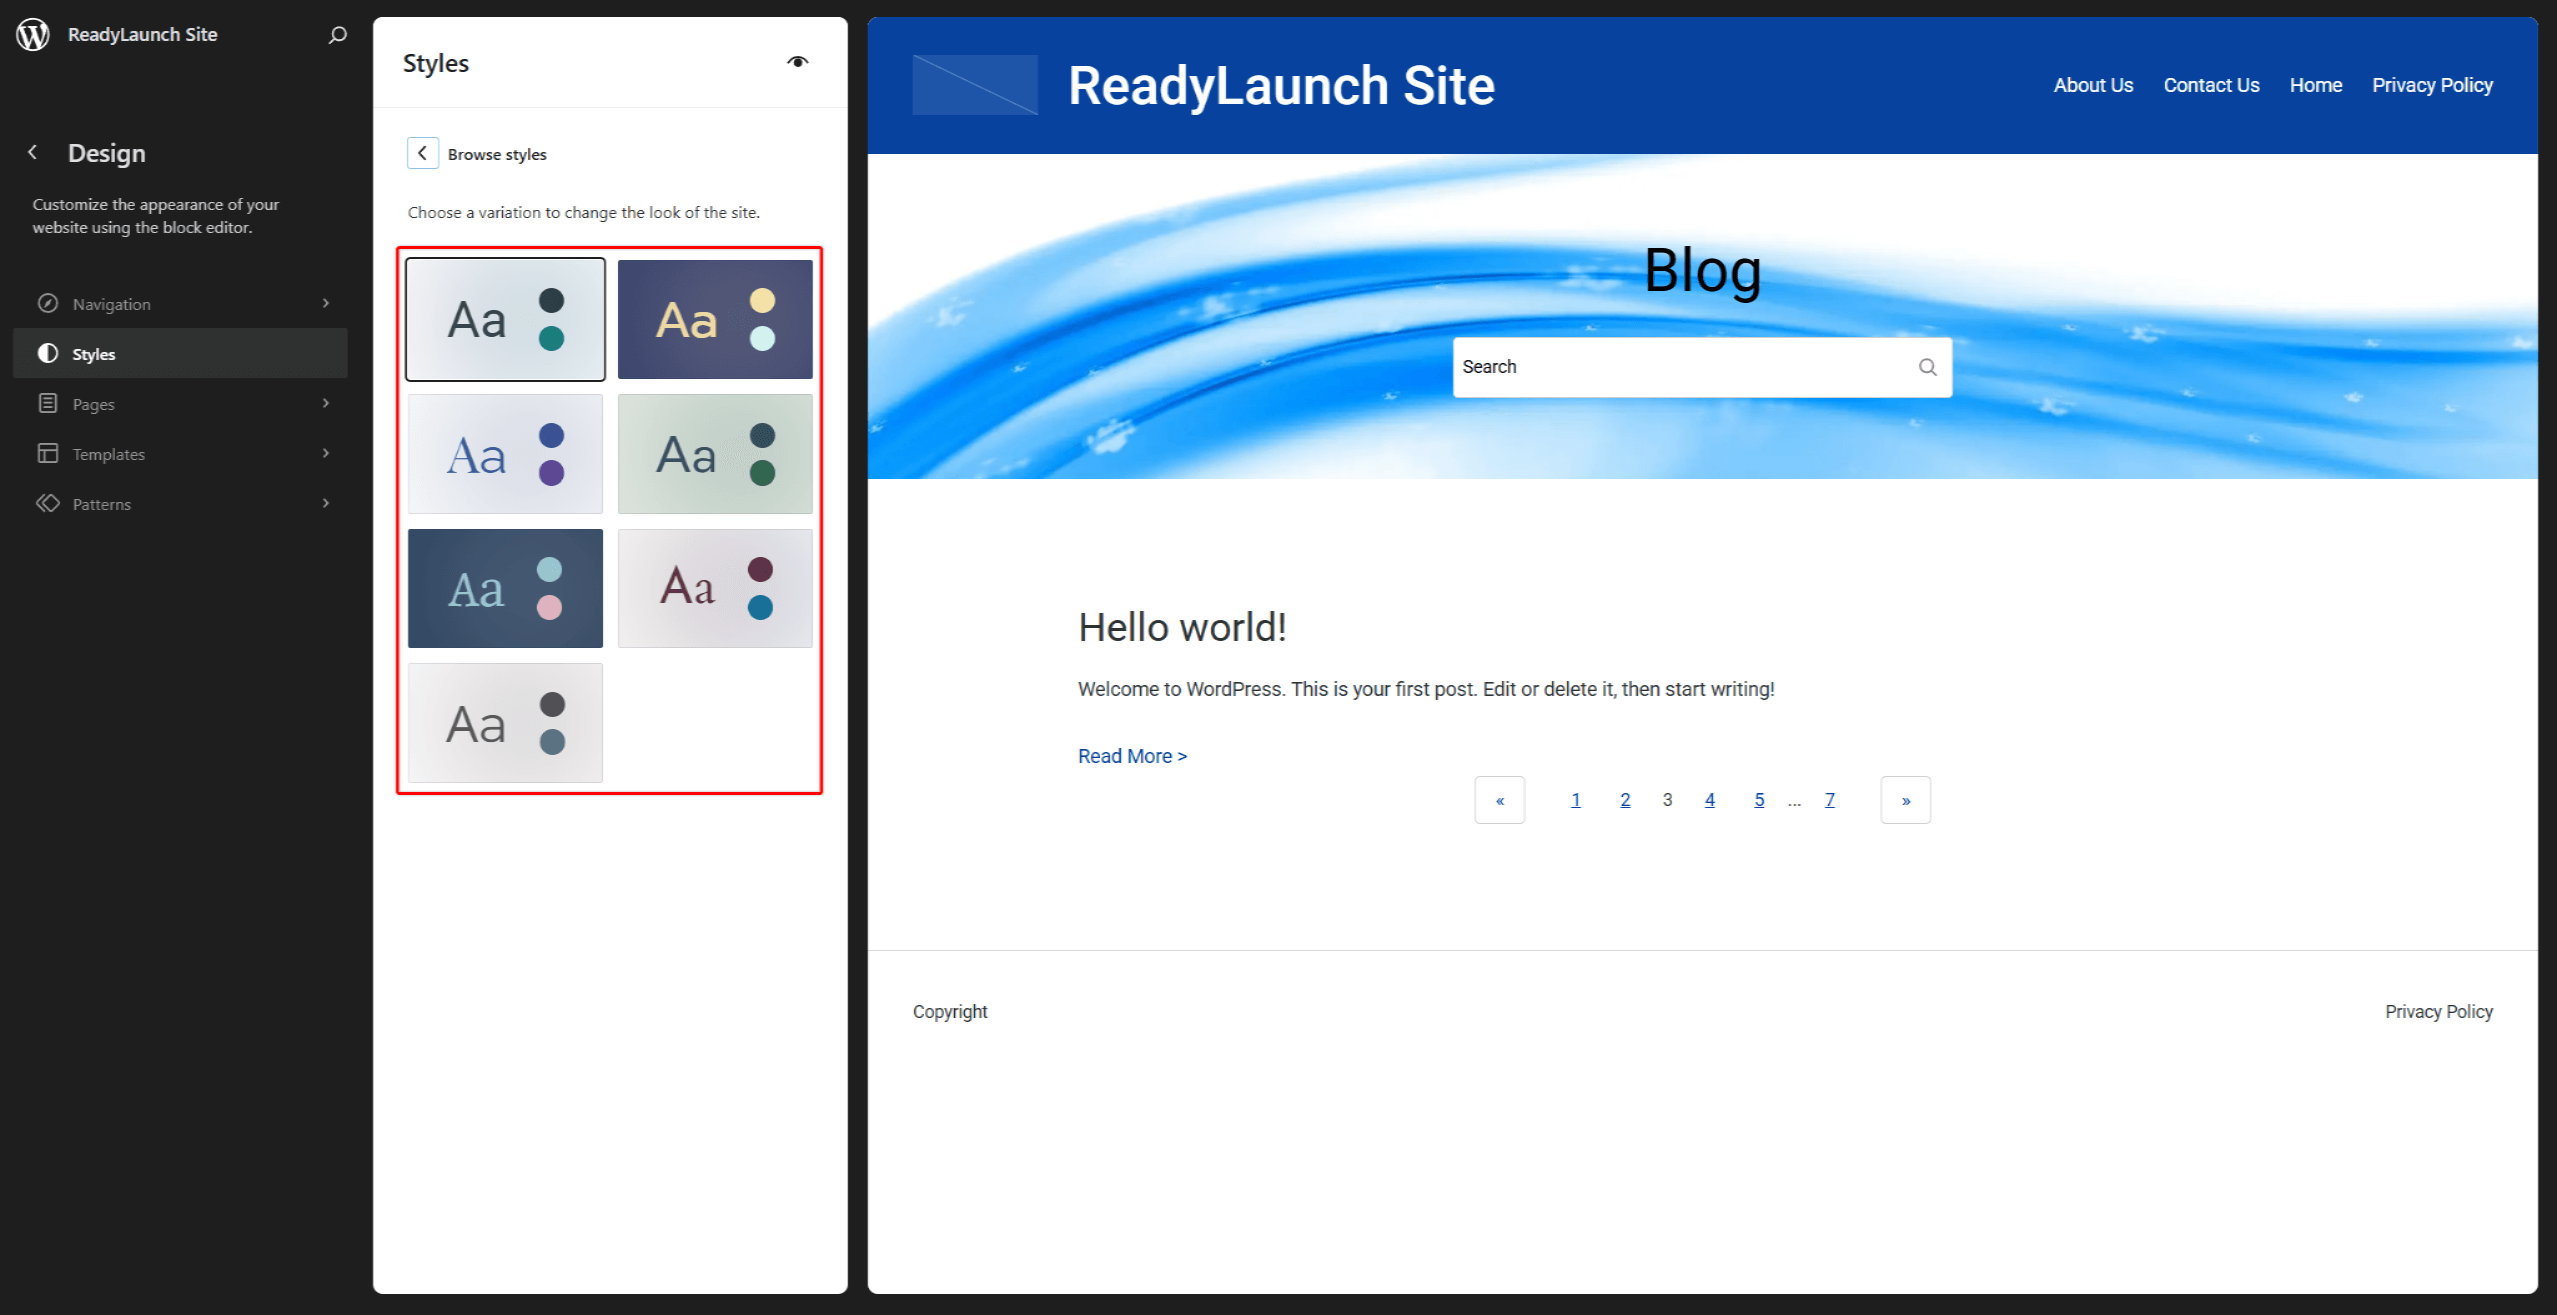
- Once you have selected a preset style, click the Browse styles link to return to the Styles menu. Here, you can further customize the style you chose by modifying:
- Typography: choose the fonts and font styles (e.g. size, spacing, etc.) you wish to use on your website;
- Colors: apply your colors to different elements on your website;
- Background: if needed, you can set the background image;
- Shadows: manage pre-built shadow styles for your website, or create your custom ones;
- Layout: set your website layout (width, padding, and spacing).\

- Optionally, you can also modify the default appearance of specific blocks. Click on the Blocks option, and select the block you wish to change.
Adding Your Content
After your website is set and styling is in place, it’s time to start adding content. You can add your content by adding Pages and Posts.
Pages are used for your main content, which is often static and timeless (rarely updated, if ever). For example, these would be your home page, contact page, login page, etc.
Posts are used for timely, regularly updated content. Some examples of posts would be news, articles, updates, or blog entries.
To add pages to your website, navigate to Dashboard > Pages > Add Page. Similarly, to add posts to your website, navigate to Dashboard > Posts > Add Posts. In both cases, this will open the default (Gutenberg) Post editor. Here, you can add blocks of content (e.g, headings, paragraphs, images, etc.) to your post or page, and style them.
You can design your posts and pages any way you want, and use any Gutenberg blocks. Furthermore, you can use the ReadyLaunch Theme Templates and build your grids, testimonials, pricing tables, call-to-action, and hero sections.
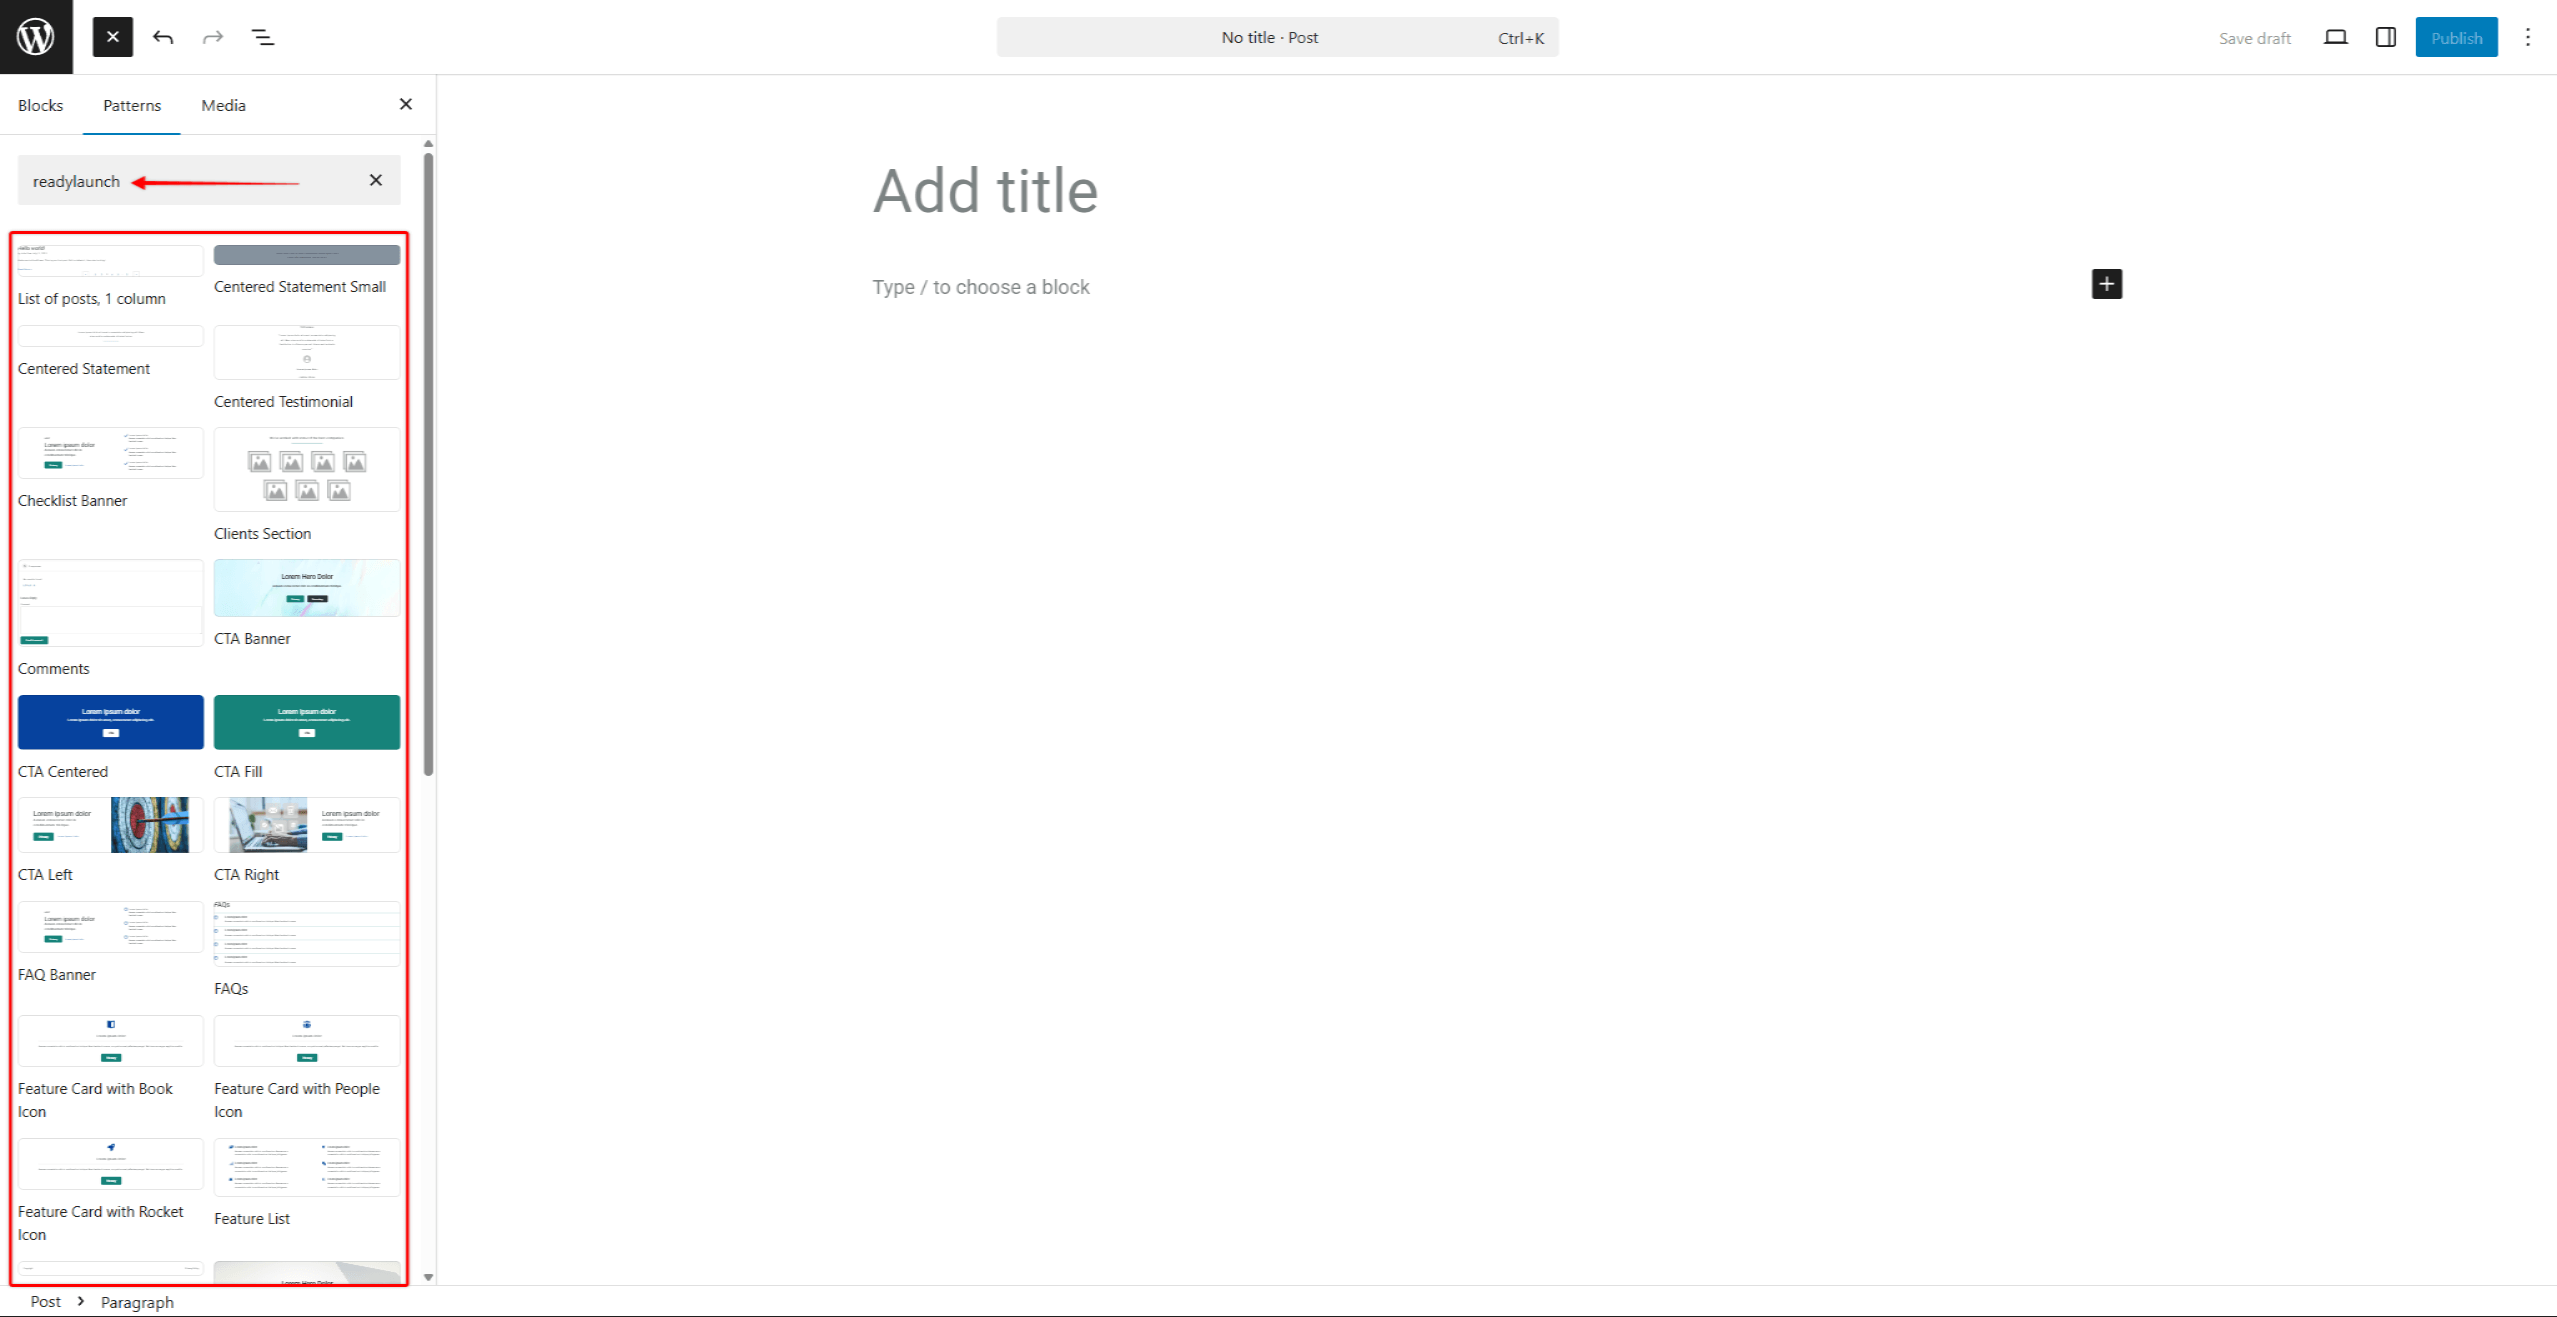
ReadyLaunch Theme Patterns
When you add a new page or post, you will be automatically presented with the available ReadyLaunch theme patterns. Patterns are pre-designed groups of blocks, allowing you to import entire designs with one click.
Furthermore, while editing a page or a post, you can preview and add multiple patterns at the Block inserter > Patterns.
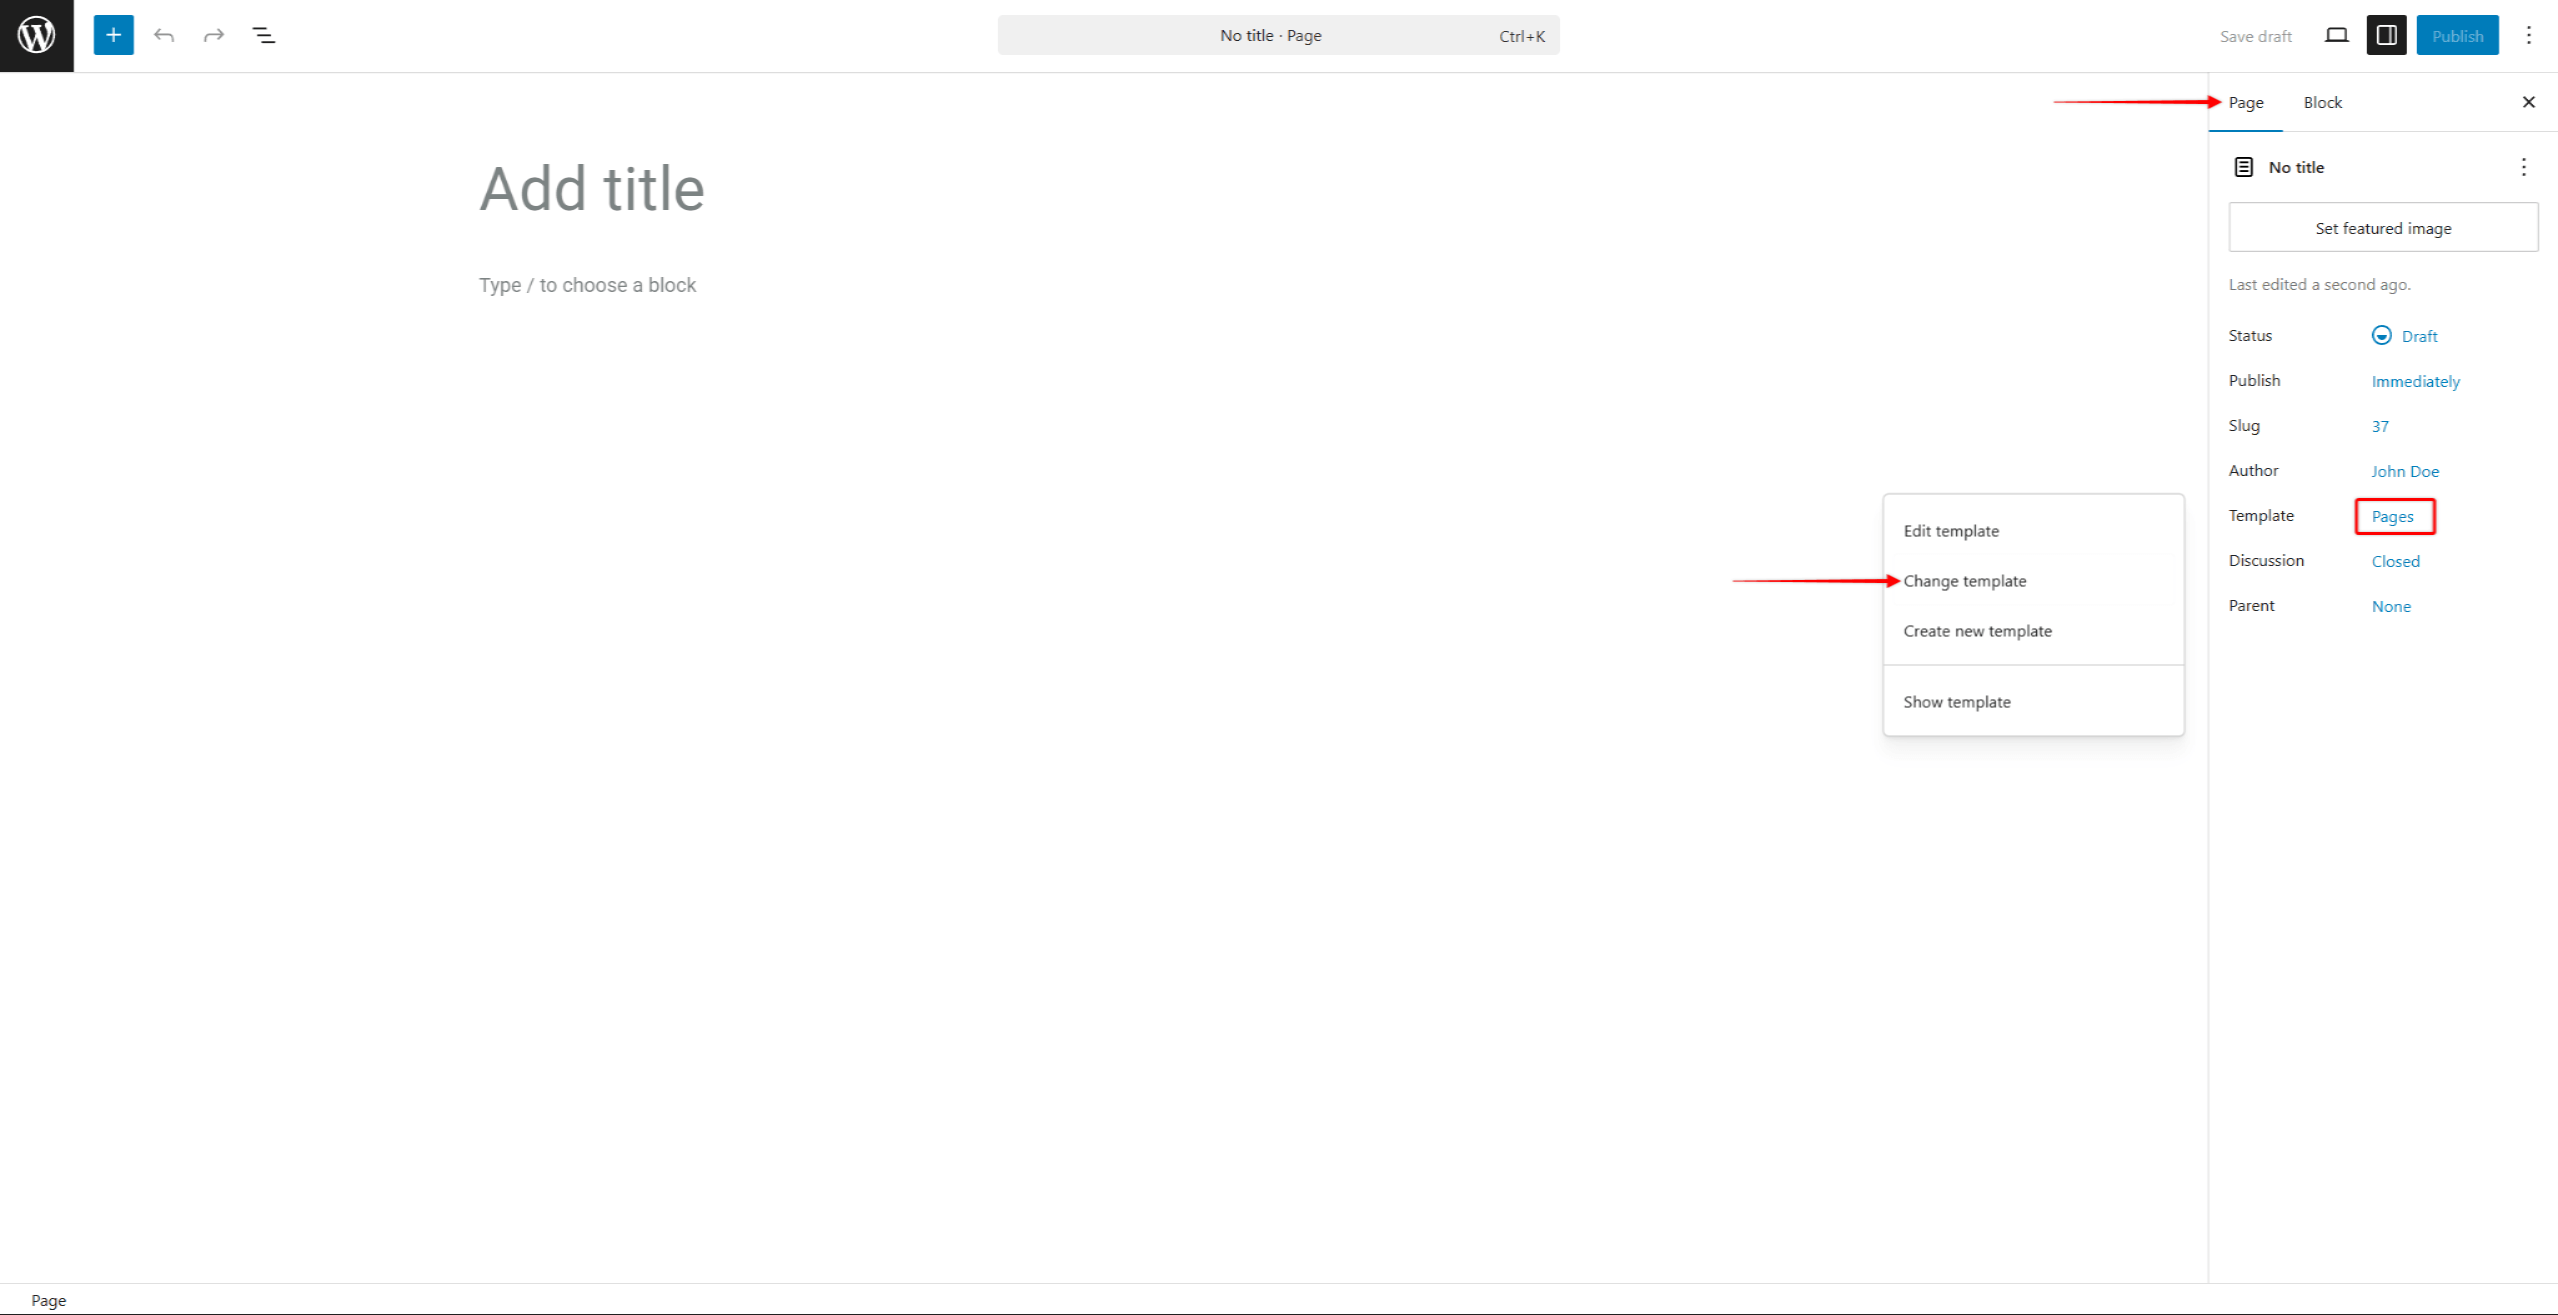
ReadyLaunch Theme Templates
The ReadyLaunch theme comes with pre-built designs and layouts for pages and post, known as templates. For example, this allows you to set one page design to include content and a sidebar, and exclude a sidebar on another page.
You can change the template for any page or post within the Post editor. This allows you to apply a different layout without affecting the content of the page or post.
What’s Next
Having the basics covered, populate your website with the necessary pages to provide information about your website and business. Furthermore, depending on the purpose of your website, you can begin adding posts to share information with visitors and encourage engagement.
Additionally, if you wish to expand your website’s capabilities, you will need to add plugins with the necessary functionalities. To do this, you can browse the WordPress Plugin Directory and choose one of the many free plugins, or upload your premium plugins.