ReadyLaunch pre-made full-page templates and template parts provide reusable layouts for your pages and posts.
This document covers the basics of using ReadyLaunch templates and template parts to build your website.
ReadyLaunch Templates
ReadyLaunch Templates are predesigned post and page layouts. These layouts set the page or post layout and designs around your content, but without affecting or adding any content.
When you apply a template to any page or post, the page or post layout and design will automatically change:
- Page Templates: Layouts designed for different website pages;
- Post Templates: Layouts intended for blog posts;
- Archive Templates: Layouts adjusted for Category/tag pages;
In addition to the full-page templates and template parts, ReadyLaunch also includes reusable, pre-designed content sections built using Gutenberg blocks (ReadyLaunch Patterns).
Template Parts
Template parts are reusable groups of blocks integrated into multiple ReadyLaunch templates.
You can edit templates individually in the WordPress editor. However, template parts work differently because they’re shared across all templates. When you edit a template part, the changes apply to all instances where it’s used.
You can edit template parts directly or through any template containing them. The changes automatically reflect across all templates using that specific template part.
ReadyLaunch templates contain the following template parts:
- Site Header: Auto-includes header;
- Site Footer: Auto-includes footer;
- Post Content: Dynamic content area;
- Sidebar: Widget area inclusion.
Managing ReadyLaunch Templates
You can manage the ReadyLaunch templates through your website’s Site Editor:
- Navigate to Dashboard > Appearance > Editor to access Site Editor.
- Next, click on the Templates menu option. This will open the Templates page.
- Click the ReadyLaunch option in the right-hand side menu to filter out the ReadyLaunch templates.
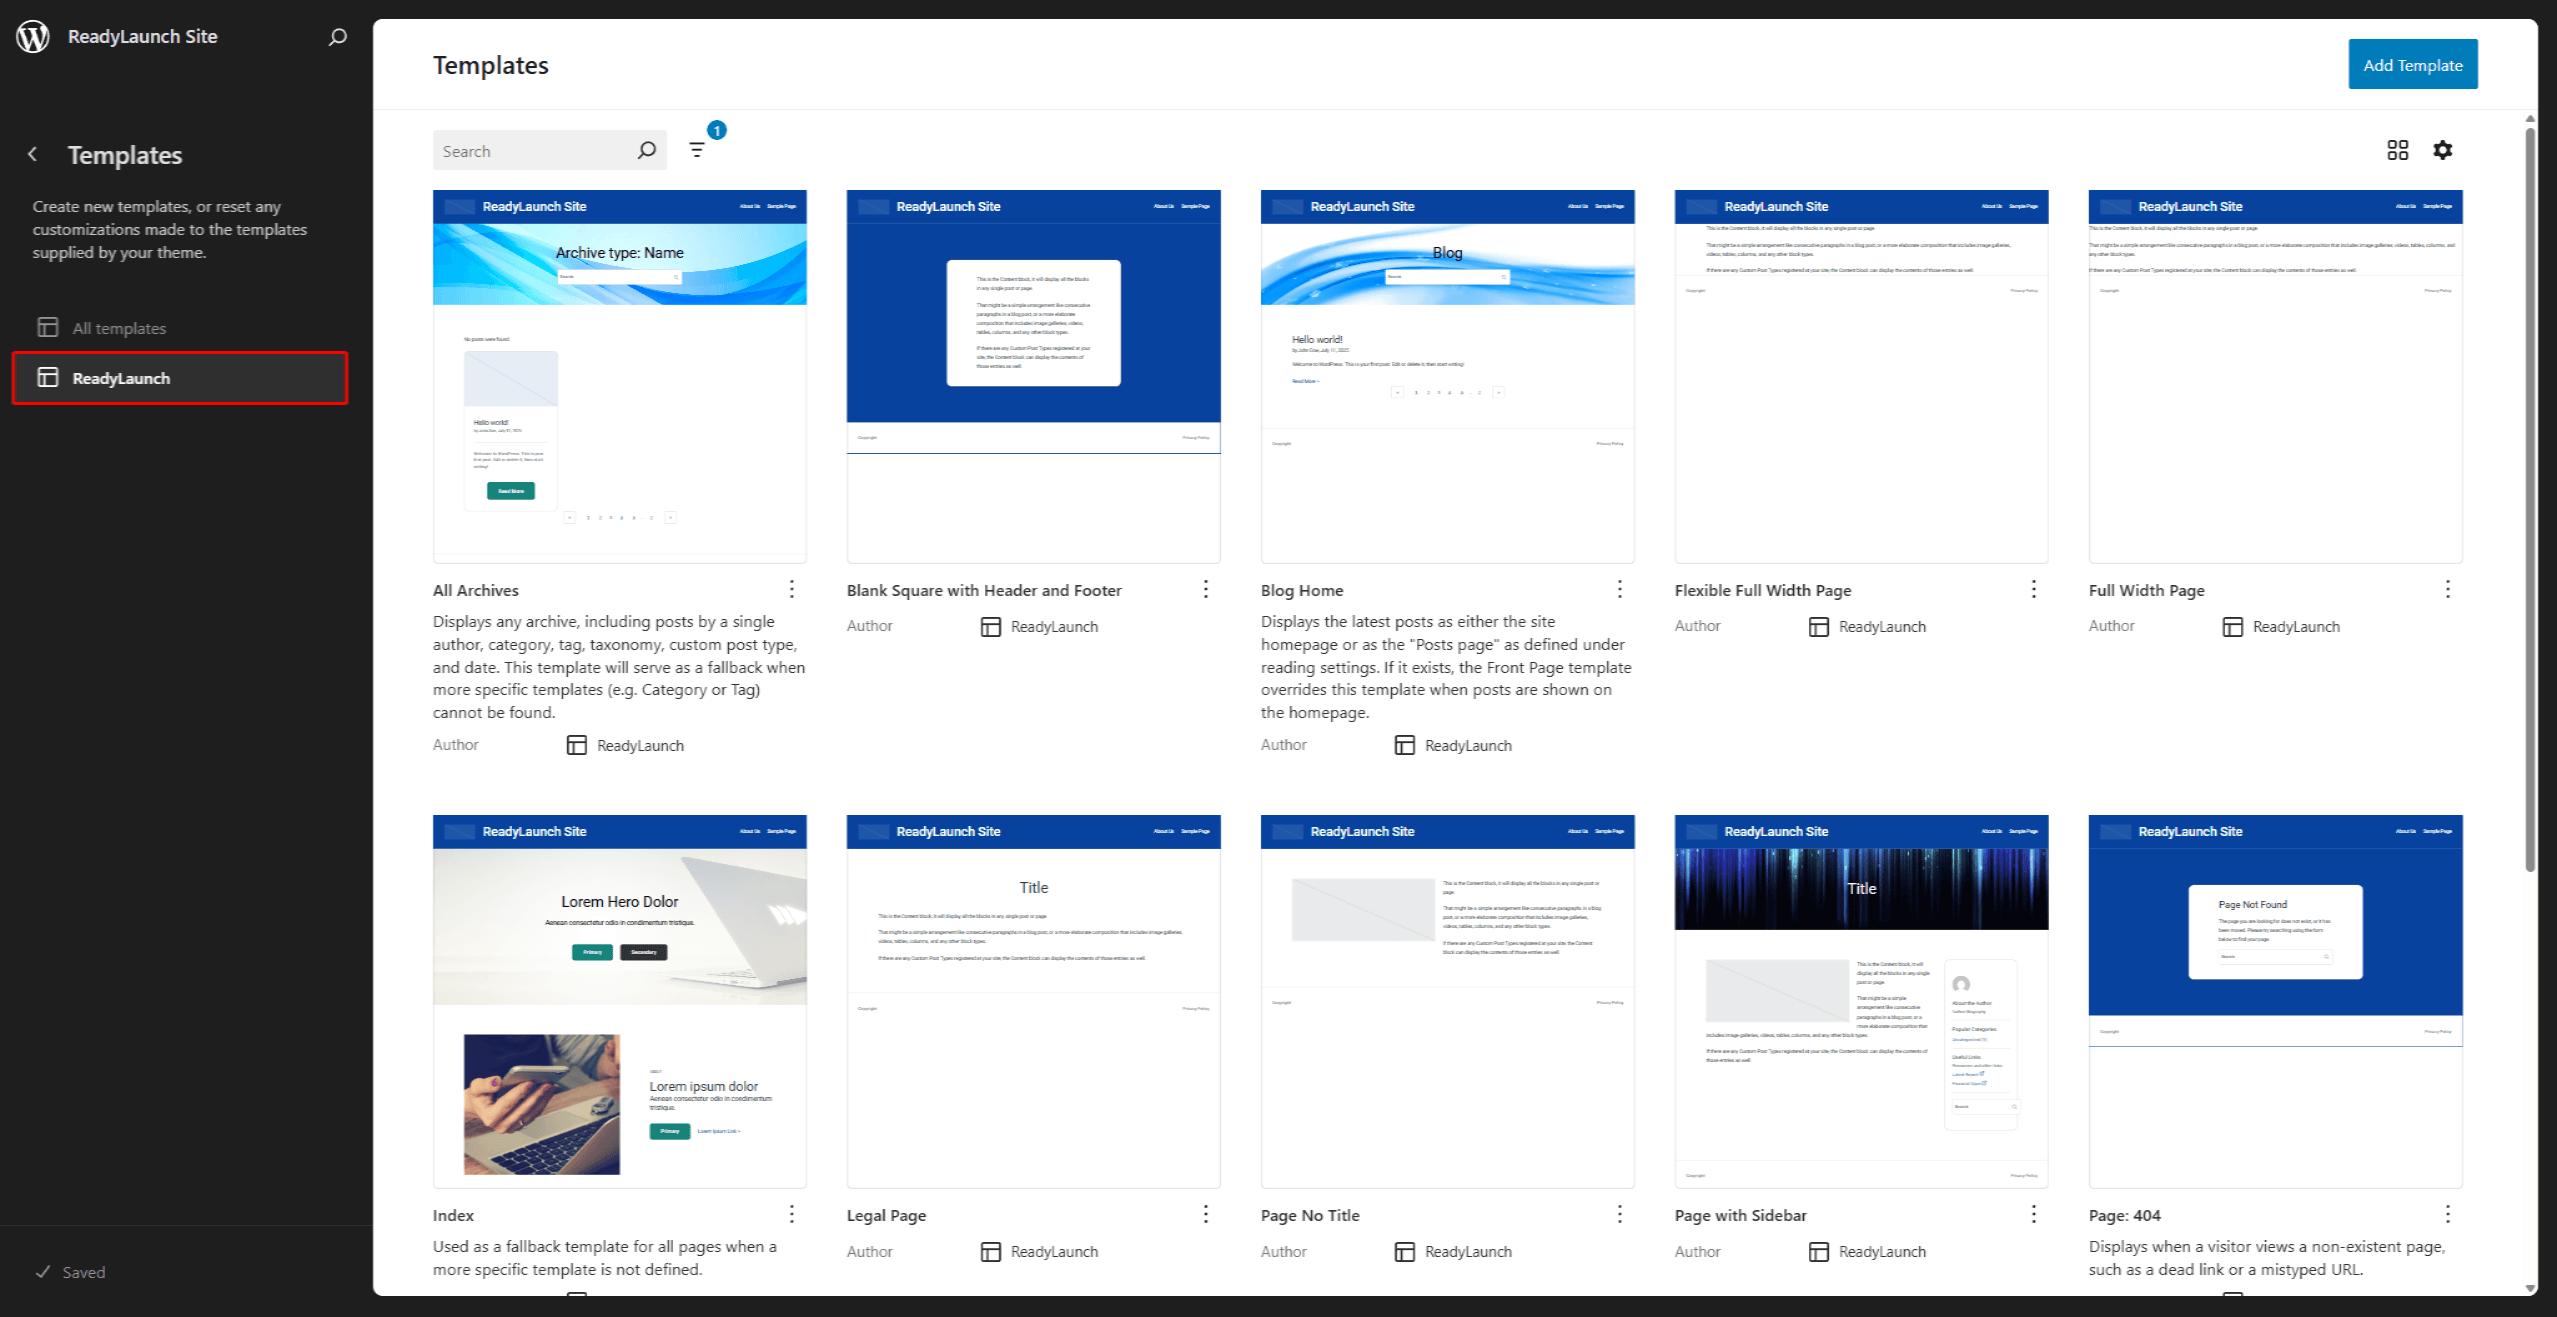
Here, you can browse and search through the list of all available ReadyLaunch templates, edit them, or add your custom templates.
Editing Templates
RedayLaunch templates are created using Gutenberg blocks. You can edit templates using the Template block editor:
- Navigate to the Templates page within the Site Editor.
- Find the template you wish to edit, and click it to start the Template editor. Alternatively, you can click the 3-dot icon on the template and then the Edit option.
- Add, rearrange, modify, or delete blocks as you would on any other page or post. You can also adjust the block settings of any block within the template.
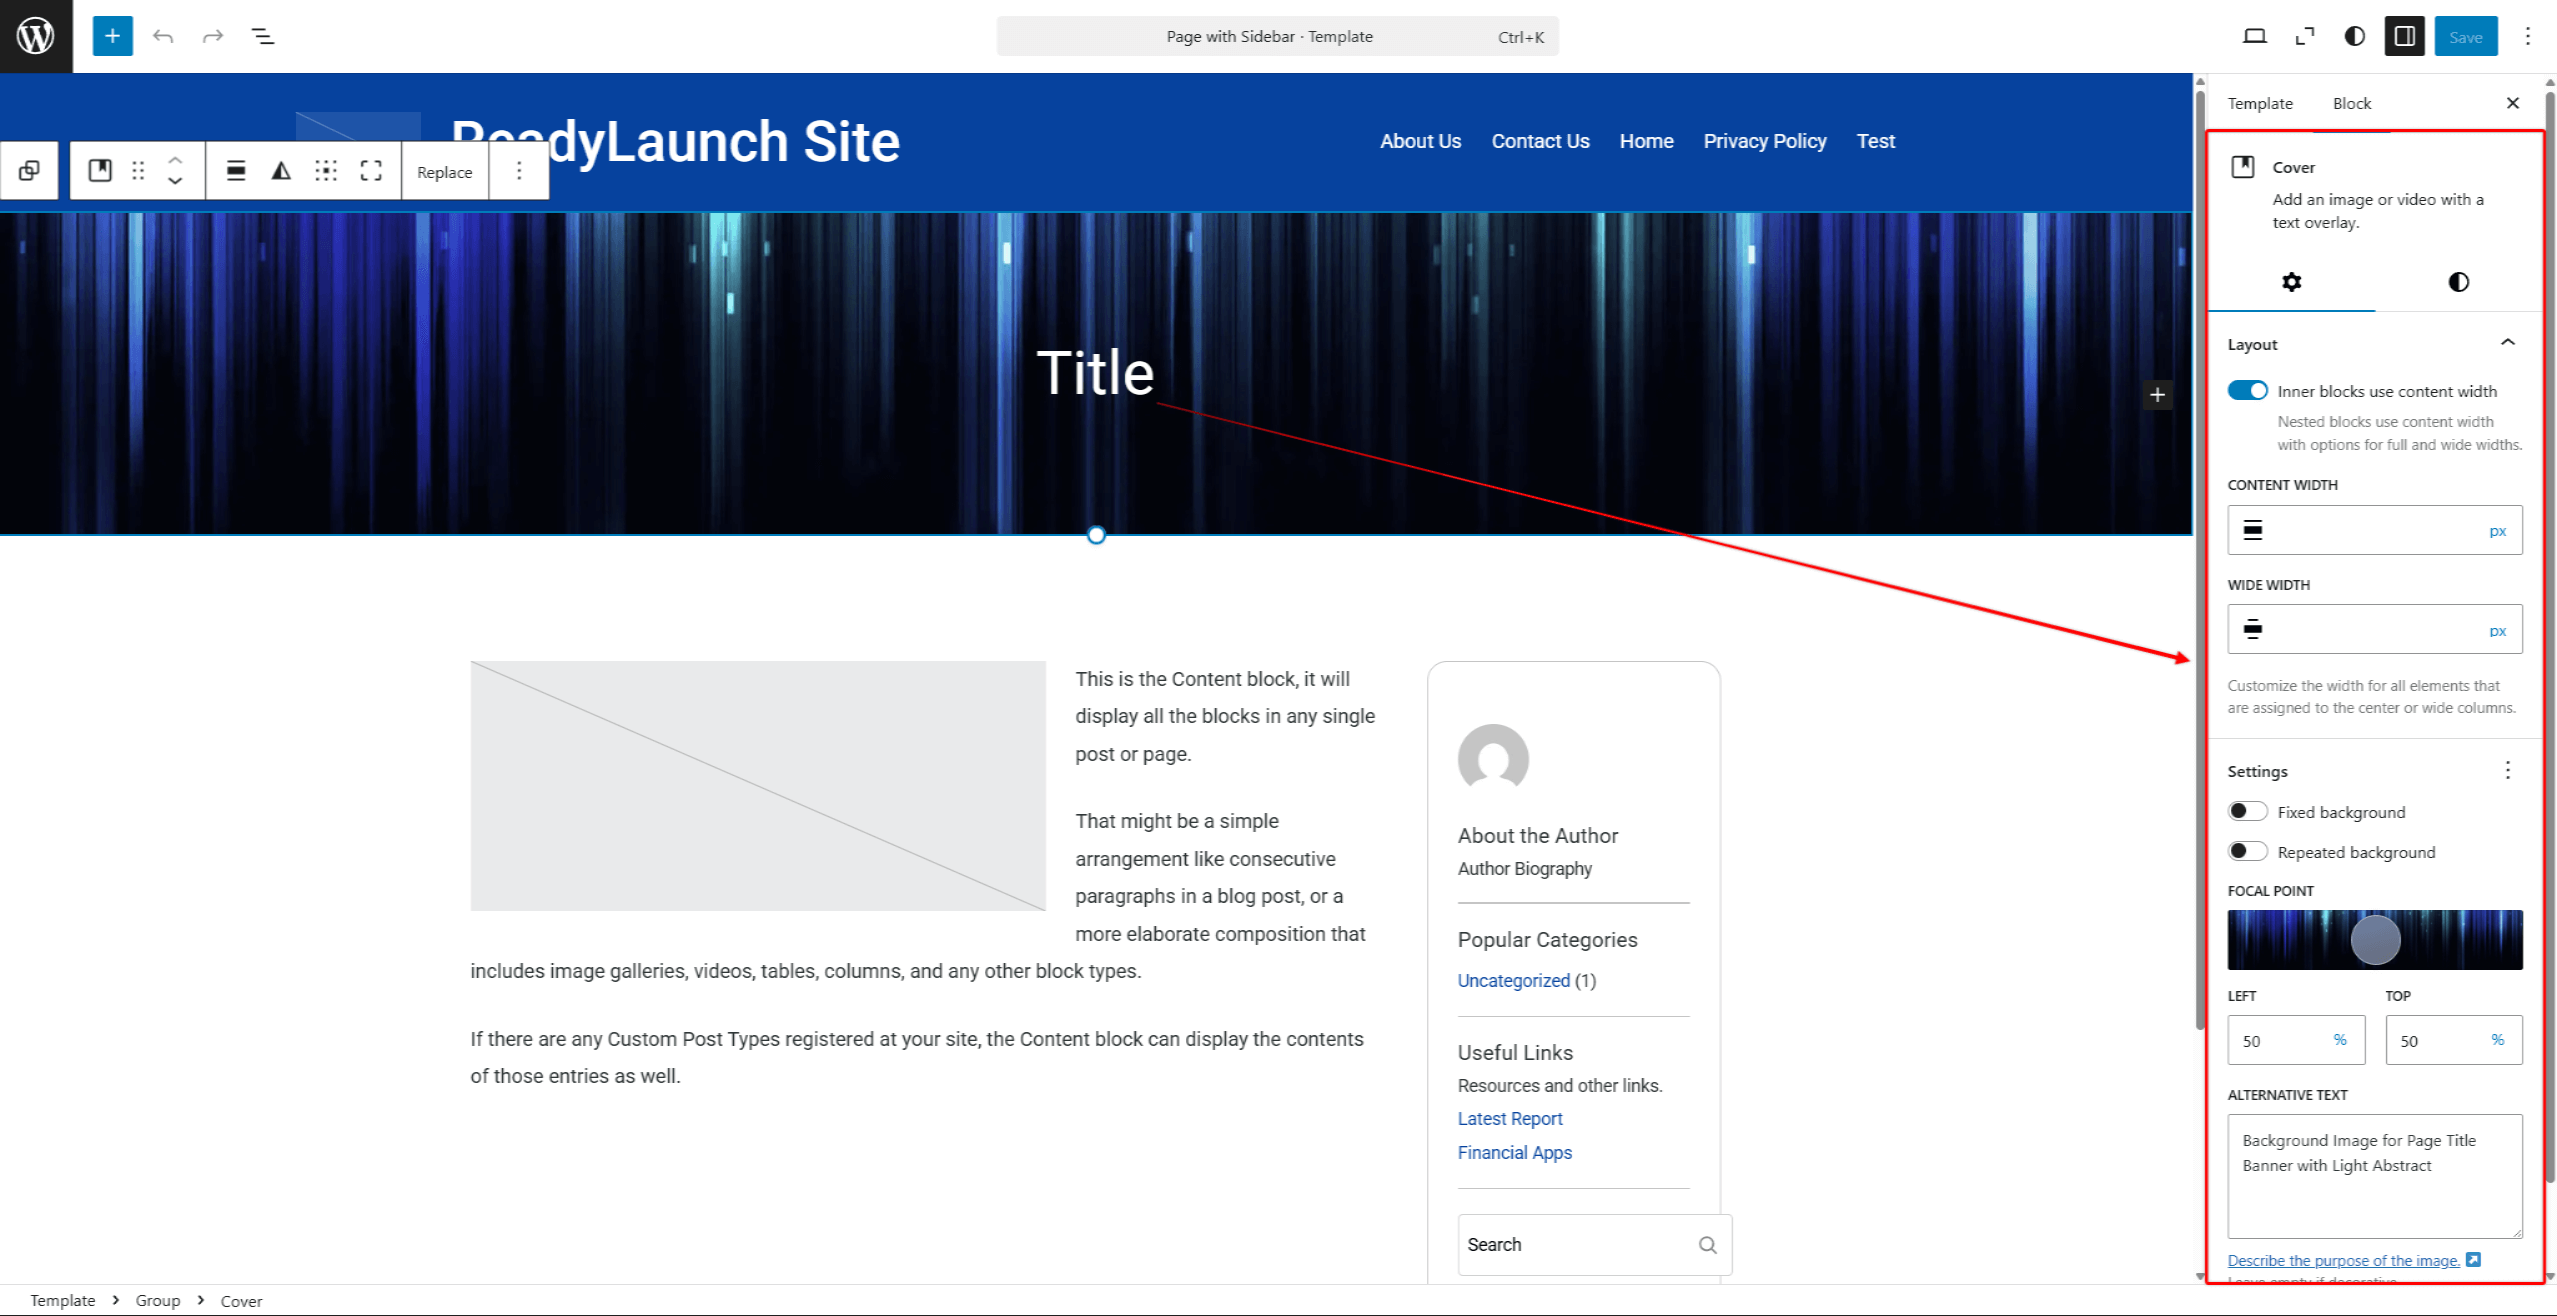
- When all modifications are applied, click Update to save changes.
Applying Templates to Posts and Pages
You can choose which template to use for each page or post. For example, to change the template used for a specific page, follow these steps:
- Start editing the page with the default (Gutenberg) editor.
- In the side panel, click the Page tab to open the Page attributes panel.
- Next to the Template attribute, click on the name of the currently used template.
- In the menu, choose the Change Template option, and select the new template.
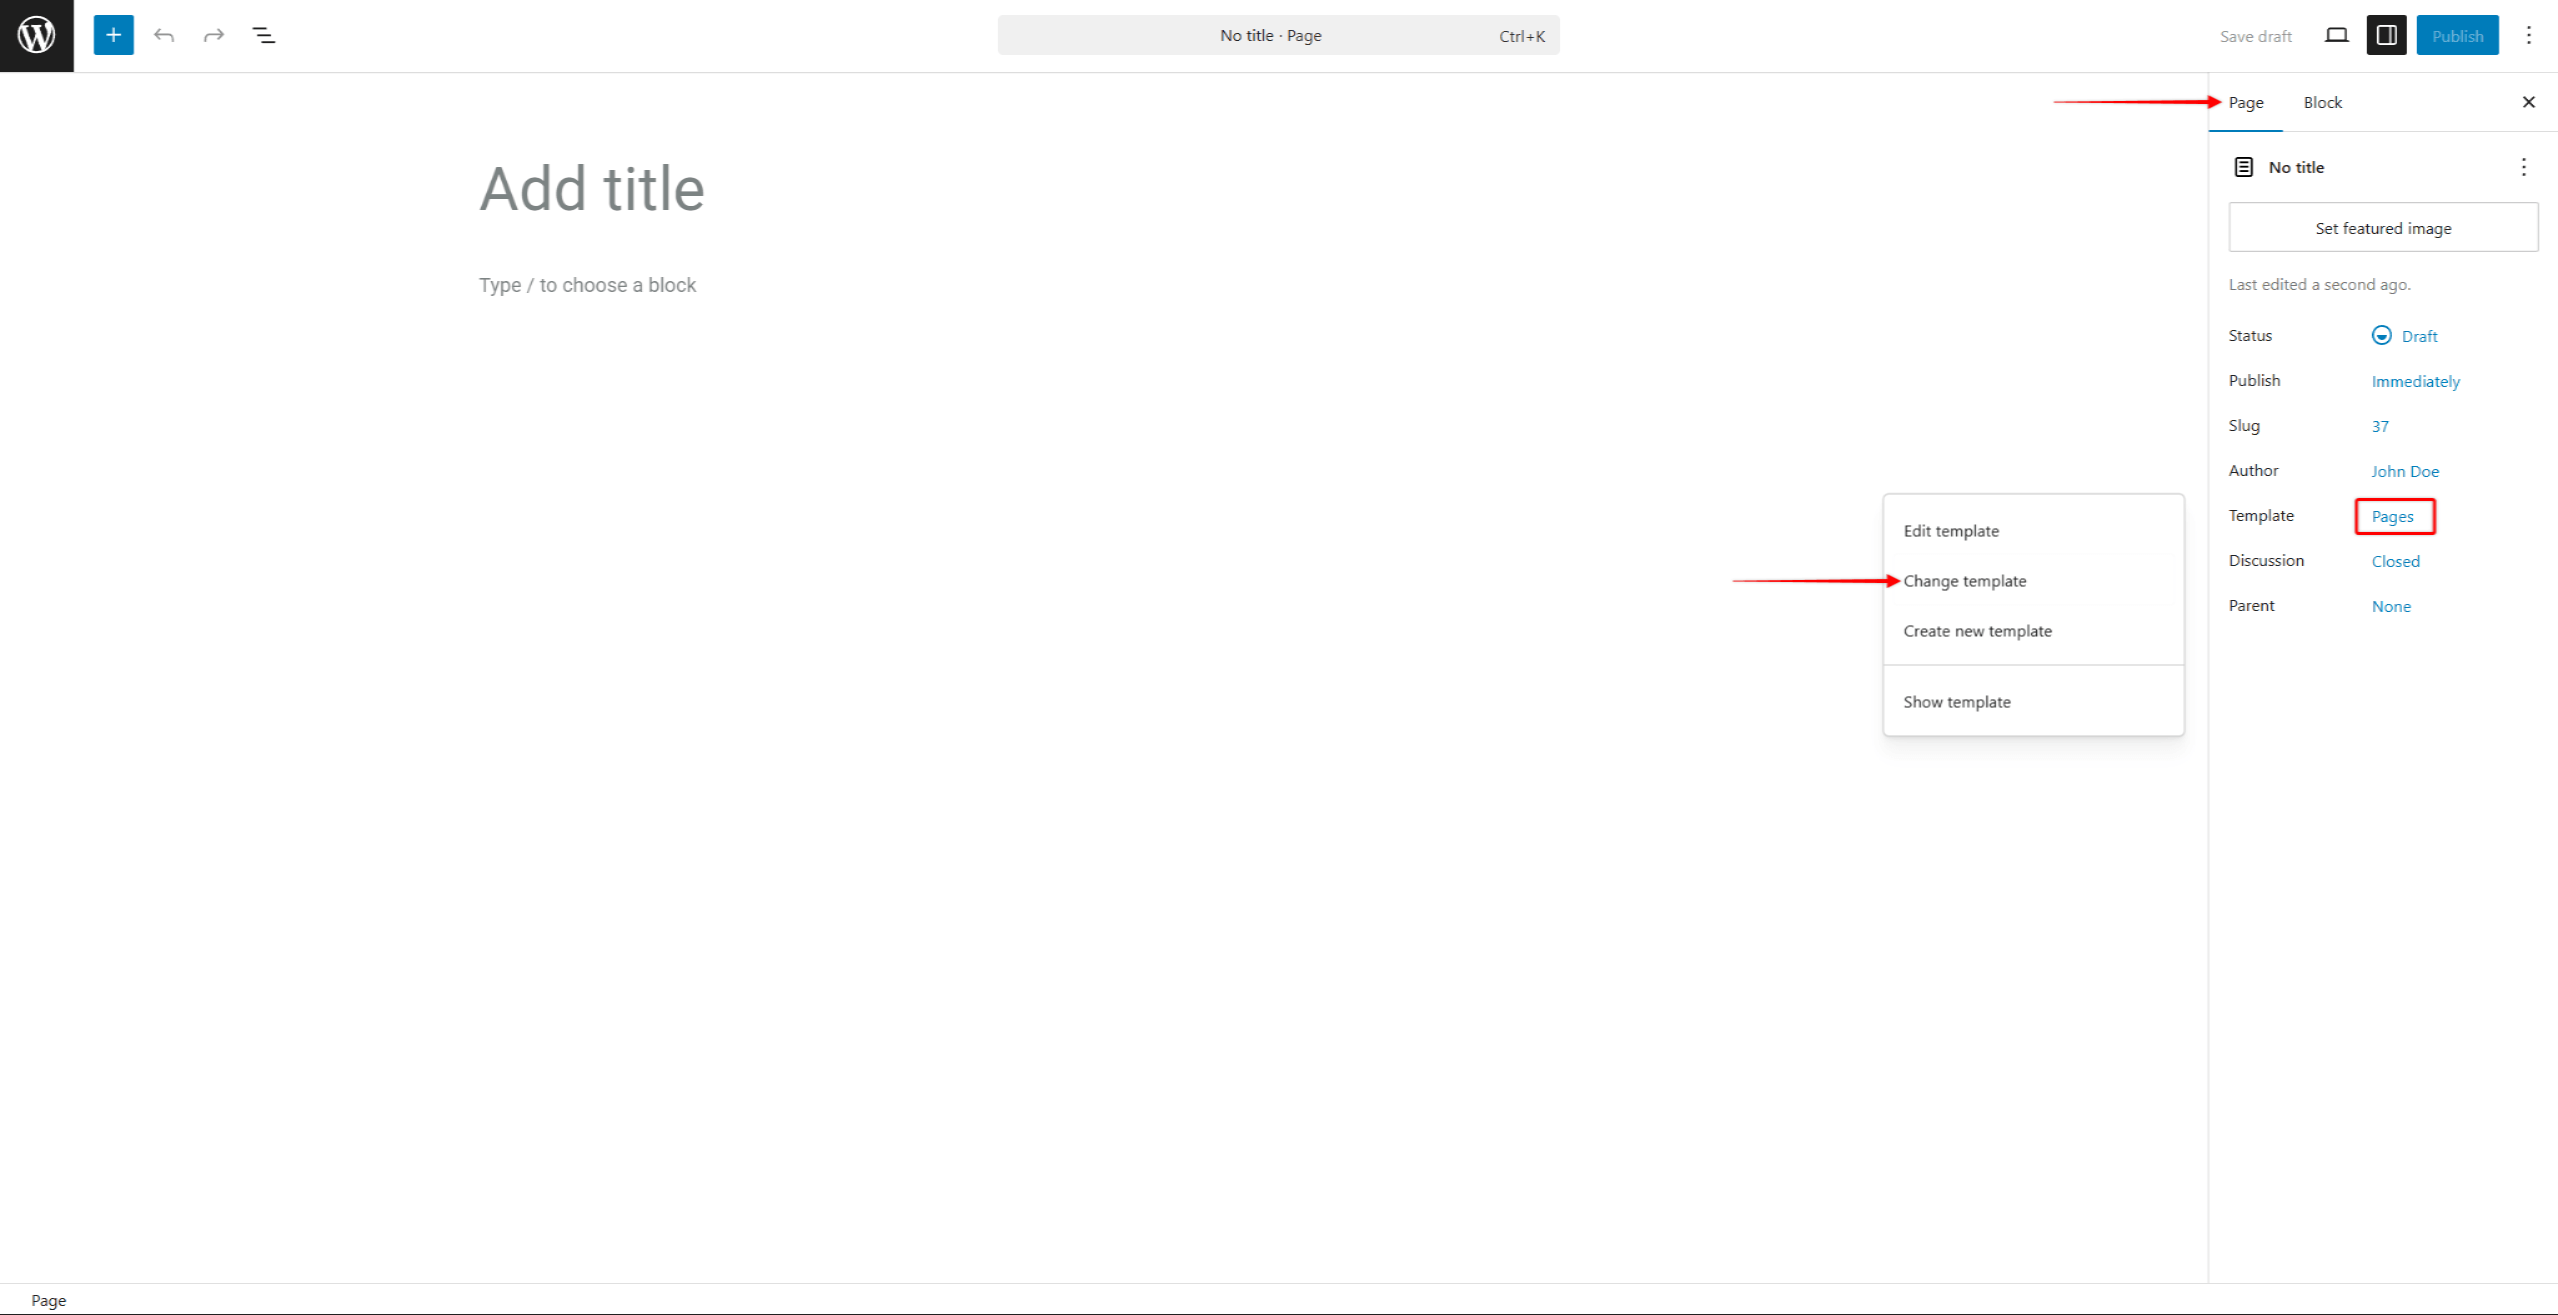
- Save changes by clicking the Update (or Publish) button.
You can update any page or post in a similar manner.
Bulk Application to Multiple Pages or Posts
Furthermore, you can apply a template to multiple pages or posts. For example, to apply a template to multiple pages, do the following:
- Navigate to Dashboard > Pages.
- Select pages to update.
- In the actions dropdown, select Edit and click the Apply button.
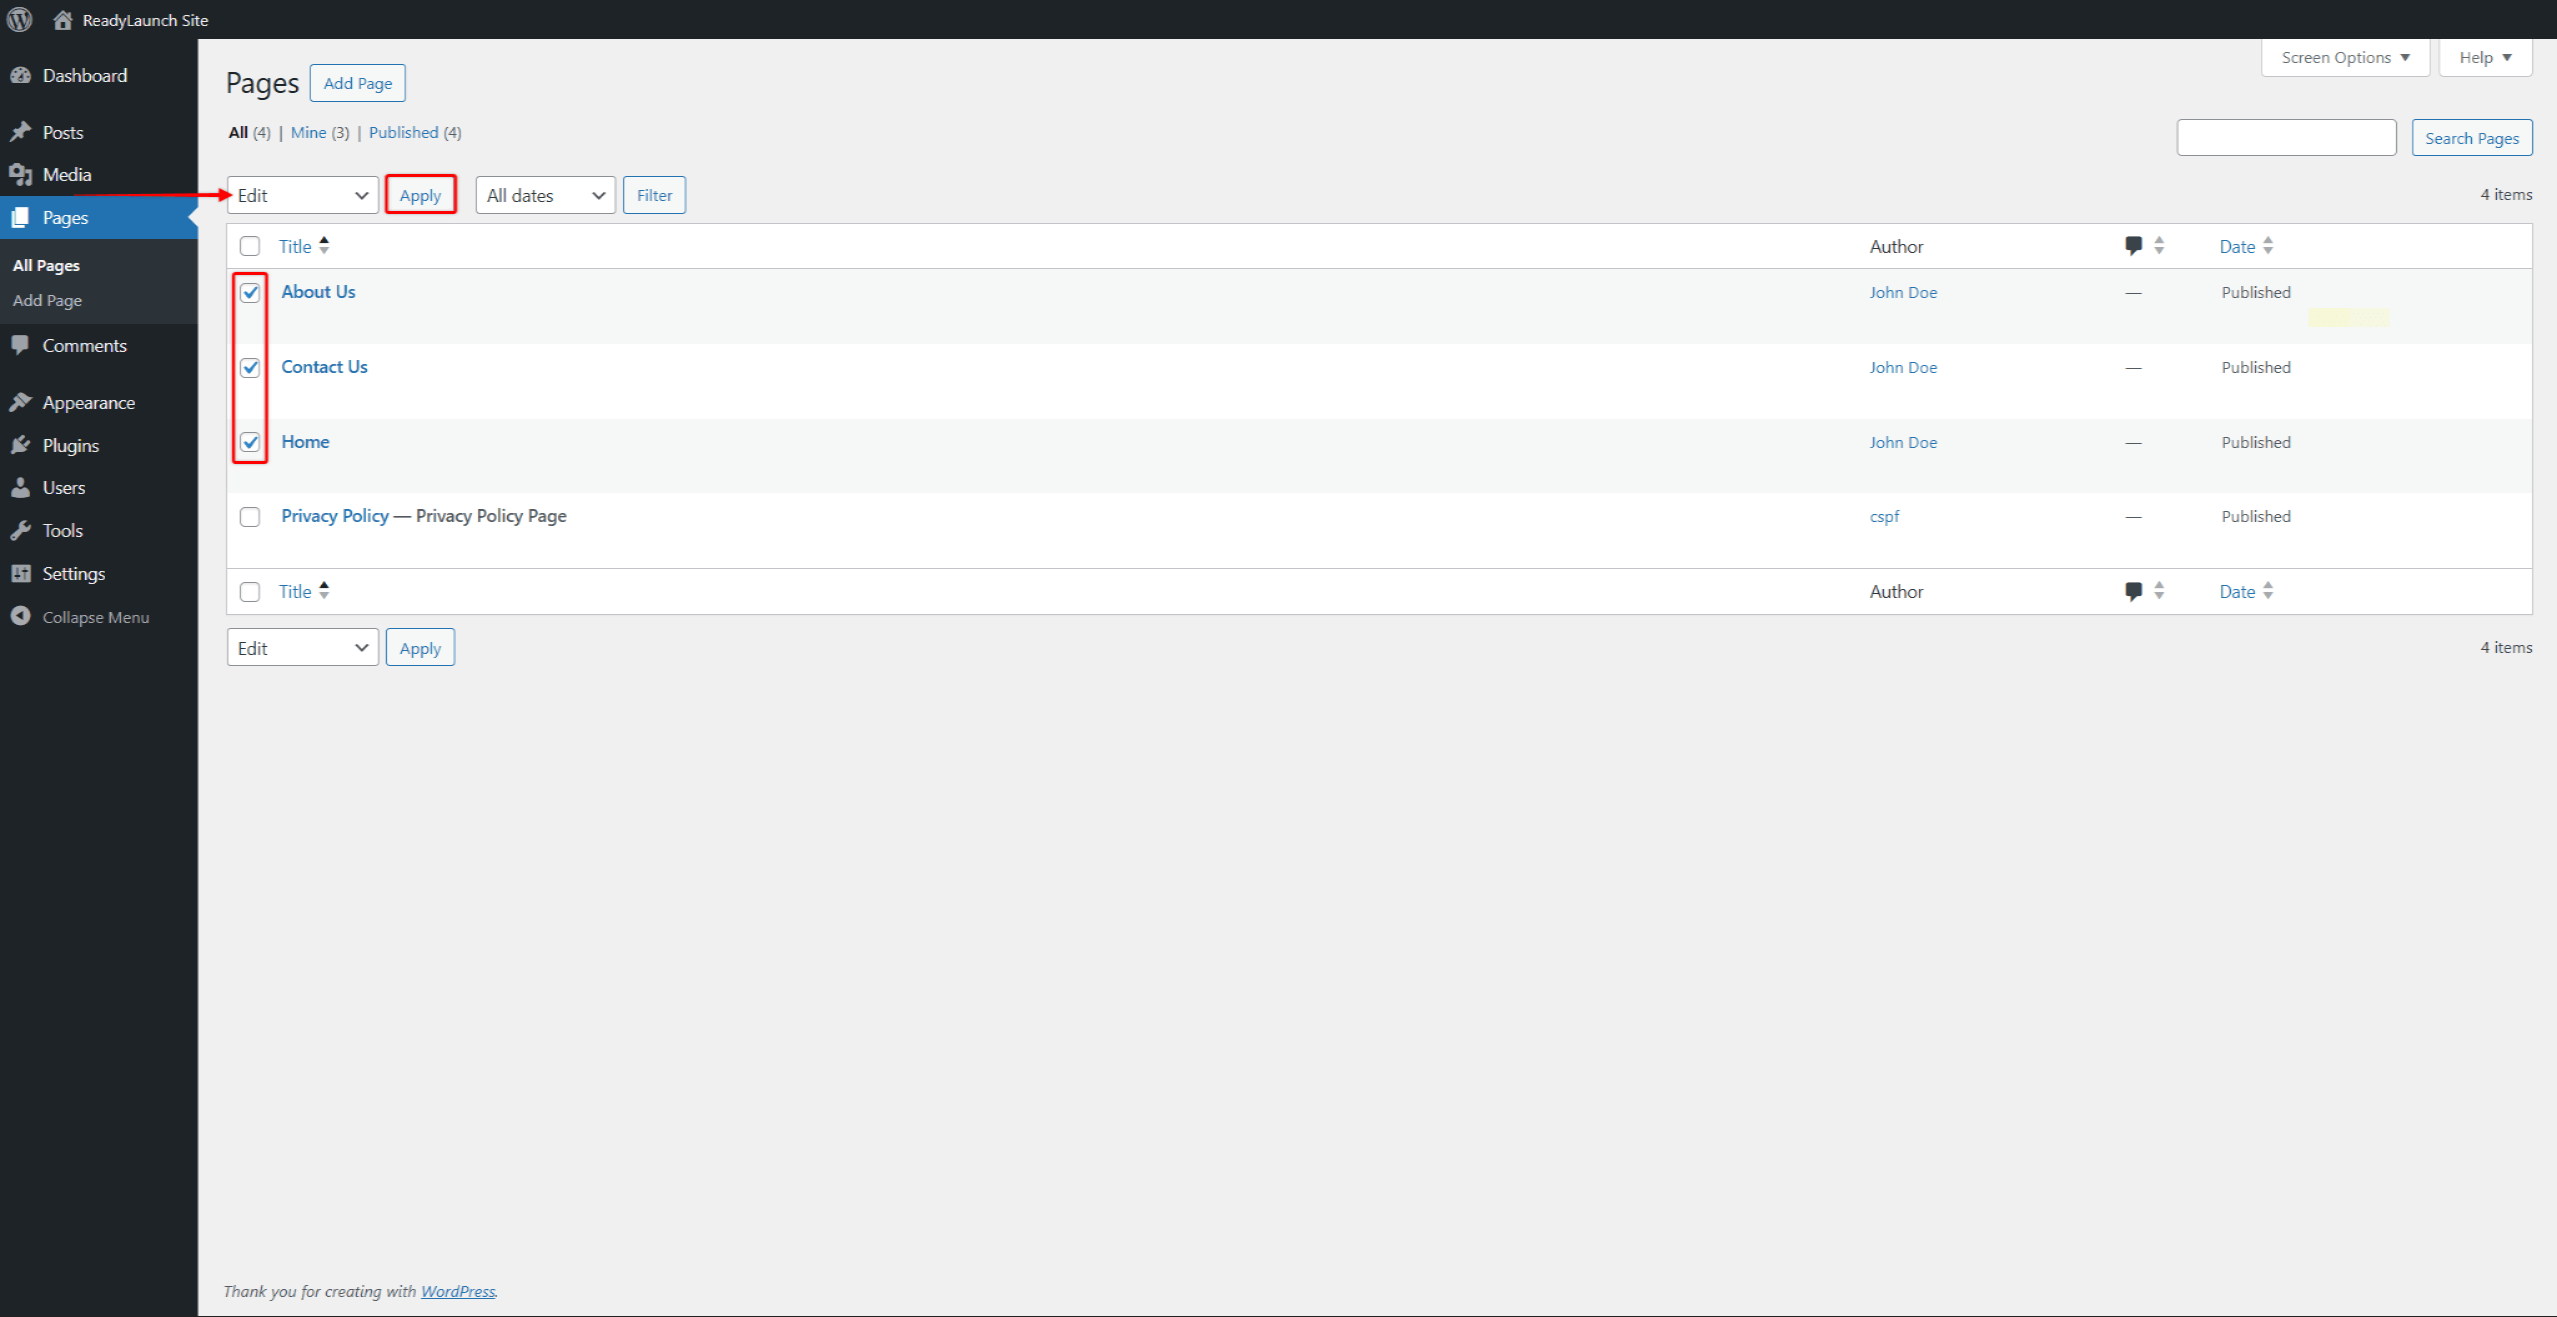
- In the Quick Edit panel, under the Template dropdown, choose the template you wish to apply to these pages.
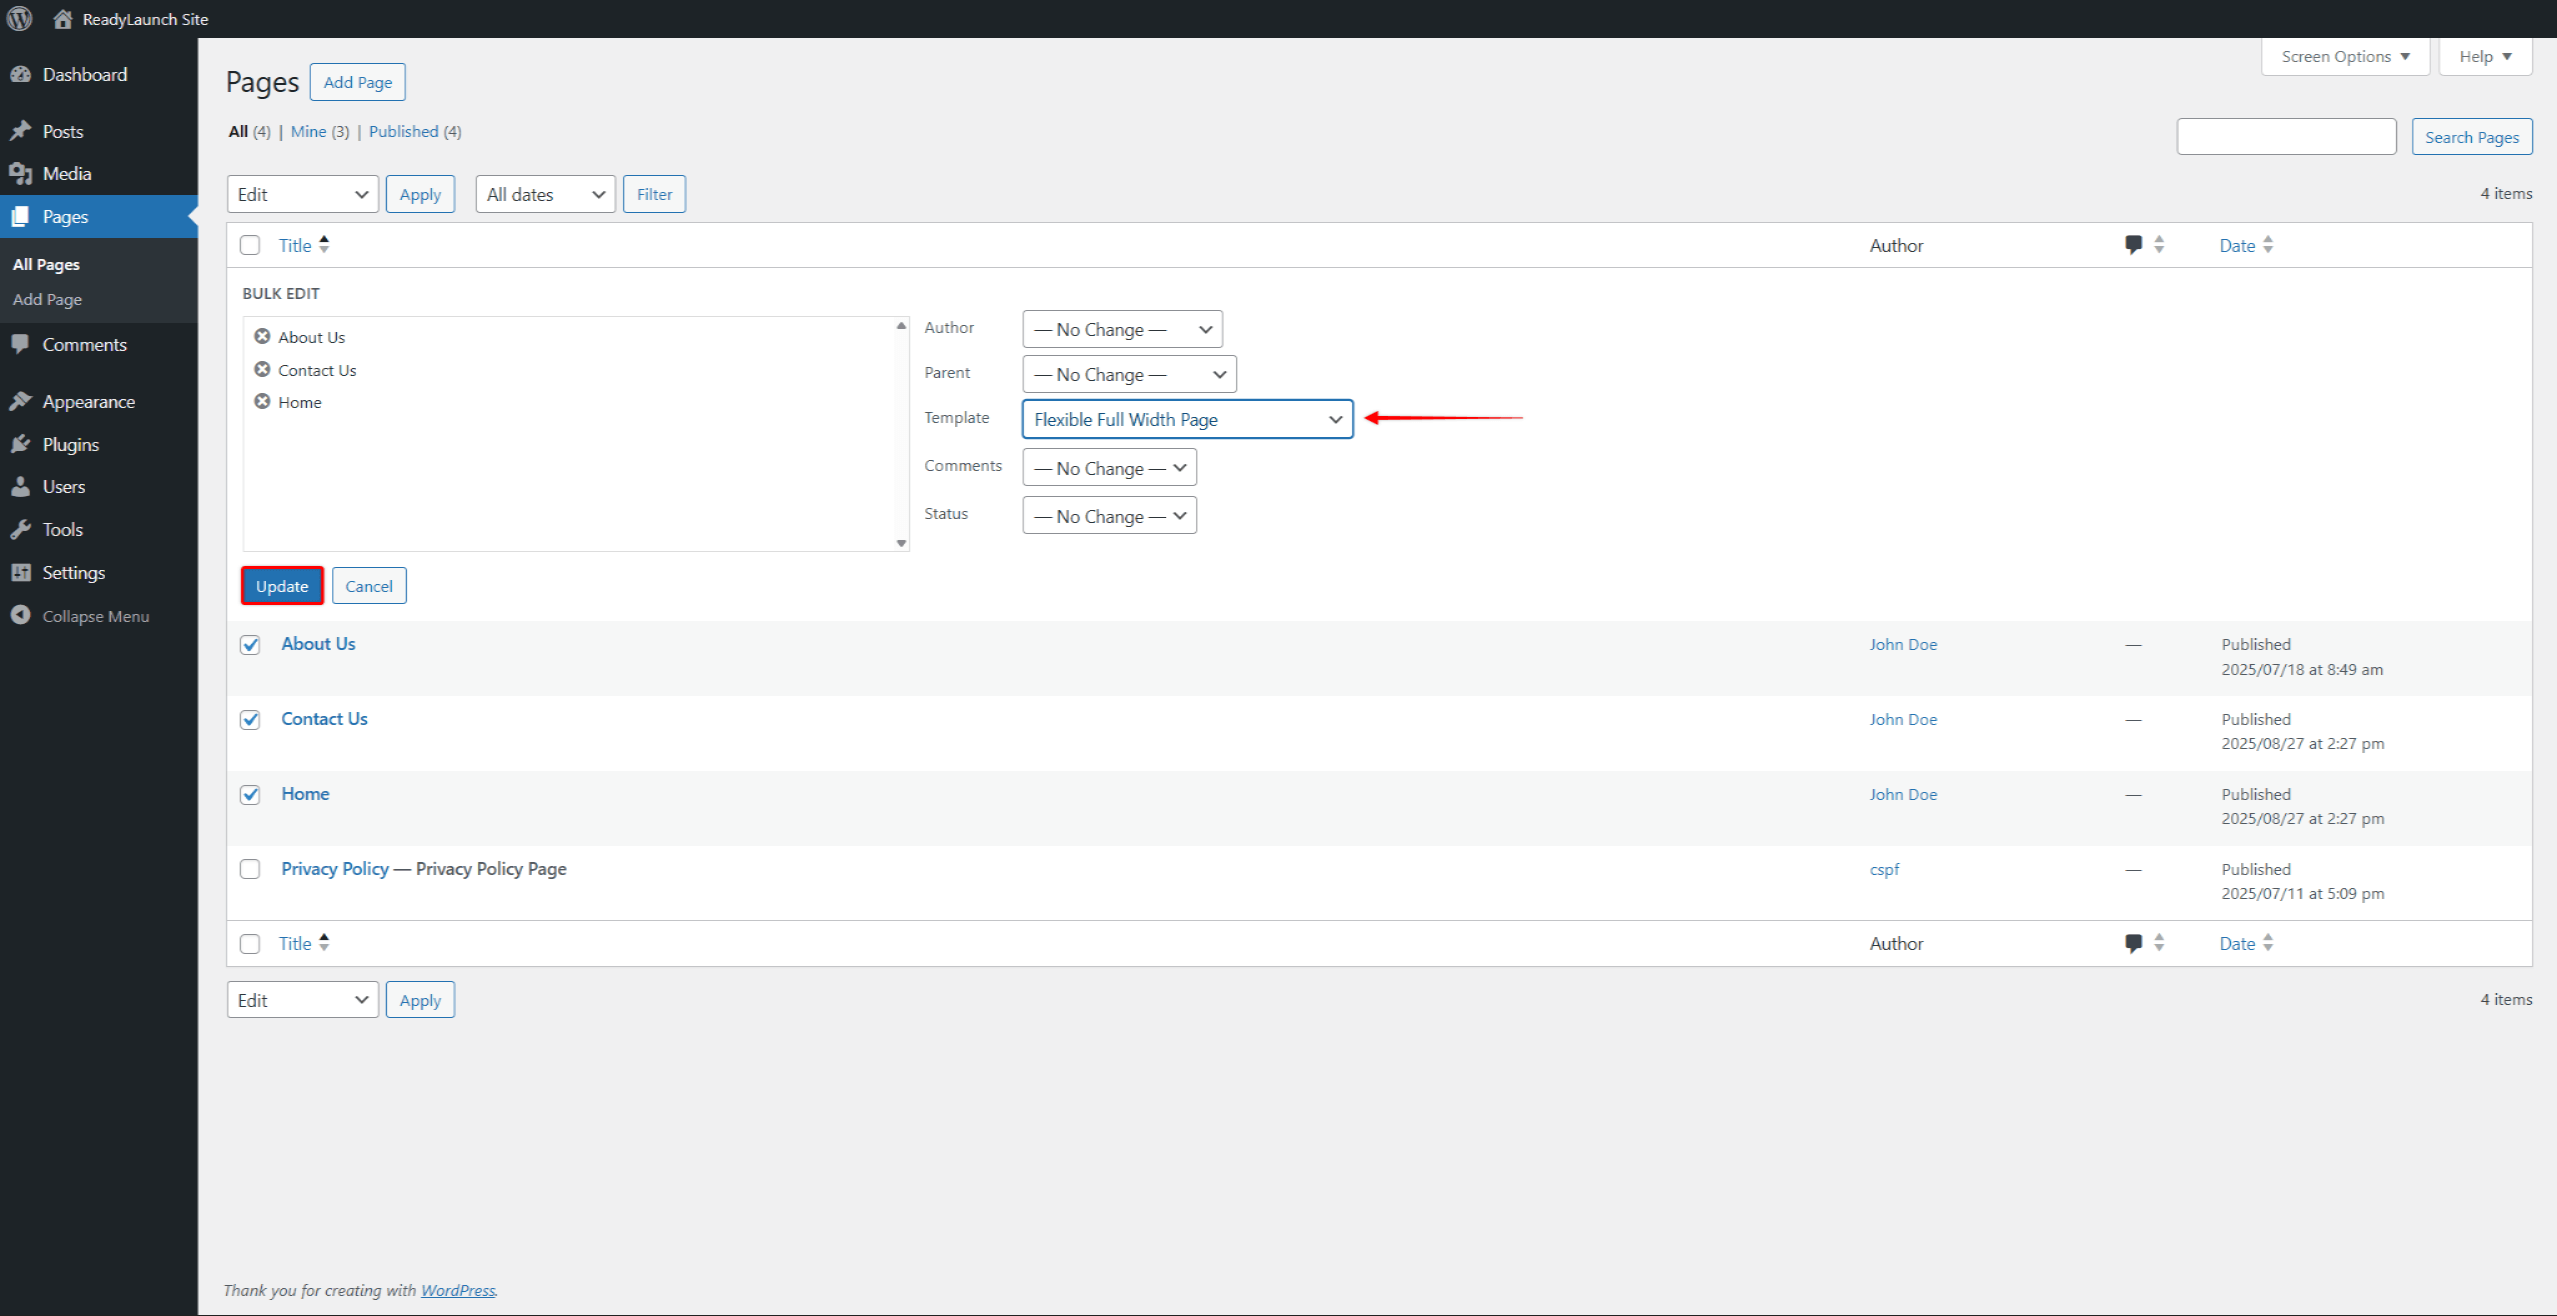
- Click the Update button.
The template will be applied to all the pages you selected. The same process applies to posts.